
The “Item reference” in Dynamics 365 Electronic Reporting models has been an elusive concept for me for quite a long time. A reference creates a kind of a cross-link between the ER model parts, but what for? Now I think I have figured out some important use cases:
- Re-use structures and record list definitions within the model, especially for UNIONs
- Map the same model in different ways and export similarly structured files from different sources
References to facilitate LISTJOINs
The LISTJOIN ER function is an analogue to the SQL UNION. It combines heterogenous record lists into one list of a common type. For example, a LISTJOIN(model.PurchaseLines, model.SalesLines) creates a typed single record list with their common fields: Product no, Quantity, Delivery date, Warehouse etc. However, for the LISTJOIN to recognize the common fields, the fields must be aligned, i.e. follow in exactly the same order, bear exactly the same names.
Here is where the references come into play. One can organize a “Dictionary” root entry in the model, define the most elementary composite entries there, then click the Switch item reference button elsewhere and include this small “brick” into a larger record. From the small bricks one may build larger bricks and so on. Such cross references are indicated by the asterisk (*):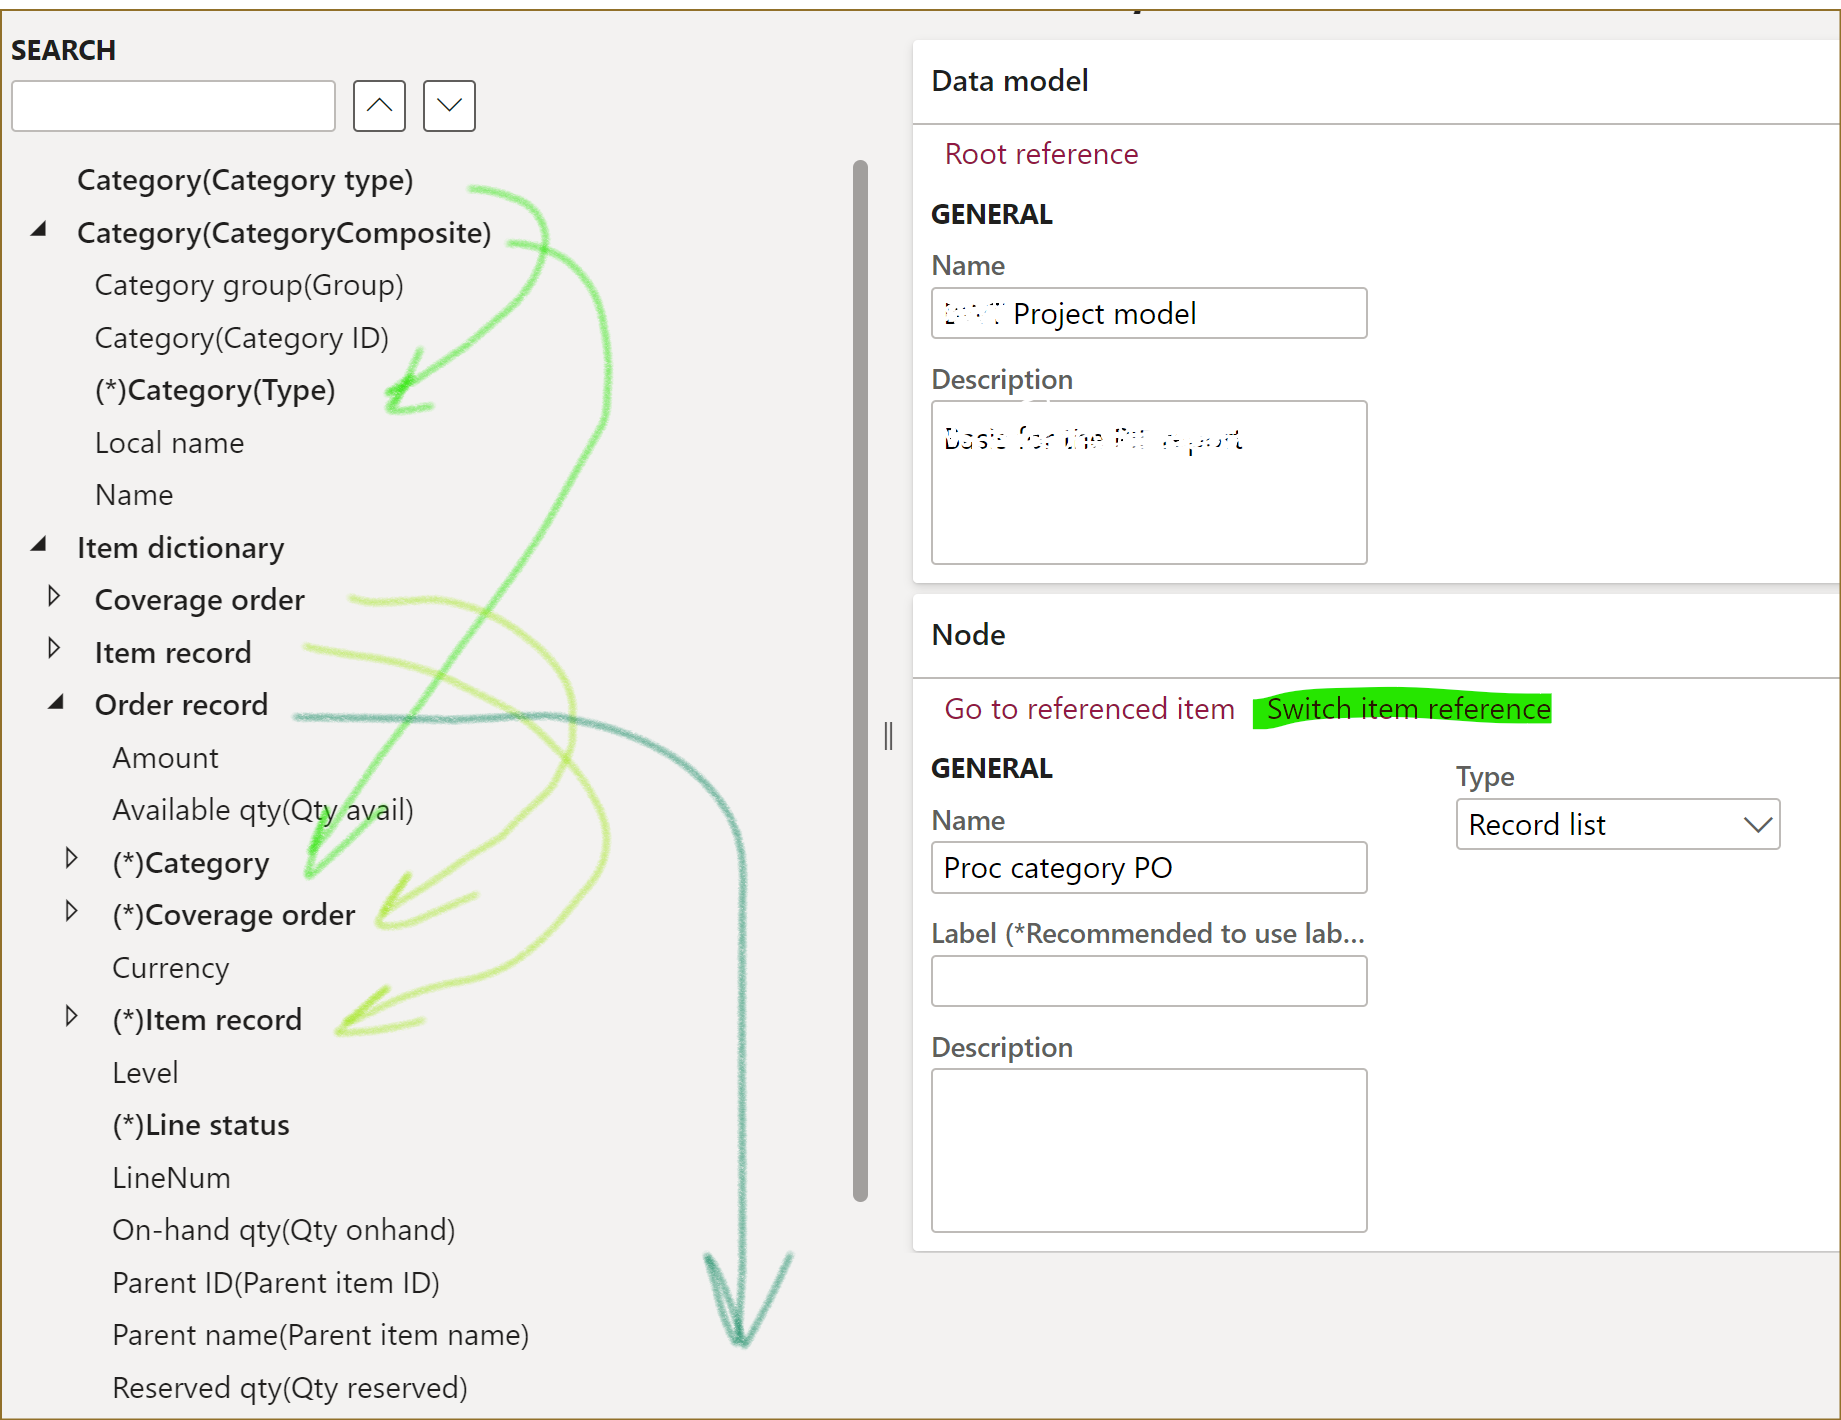
In the above example, an Order record includes the CategoryComposite, Coverage order, Item order nested 1:1 records, and uses fields of the Category type and Line status enumerations. The resulting common Order record type is further assigned to the Sales and Purchase record lists, and this makes their structure in the model identical. The LISTJOIN() then produces a list of records with the following fields:
@.Amount
@.’Qty avail’
@.Category.Group
@.Category.’Category ID’
and so on.
By the way, the root node Item dictionary here is a Container. A Container is used simply to put together diverse artefacts, a way to make the model definition more readable.
References to apply different mappings to the same model
Imagine you need to export sales order lines and purchase order lines into 2 different files, similar in structure. You need a model to abstractly describe a generic Order line list, then a Sales line format export definition, a Purch line format definition both preferrably derived from a common Order line format, and 2 mappings: Sales line to model and Purch line to model to populate the Order line list model from 2 different data sources in Dynamics 365.
Try to run the Sales line format file. It is going to start complaining about 2 models present: “More than one model mapping exists. Set one of the configurations as default.” You set the Sales line to model as Default for model mapping = Yes and the export starts working.
No try to run the Purch line format. It is going to export sales order lines in the purchase order line format, because a link between the format and the outbound mapping is through the model node they use:
Format → Model [node] → [default] Model mapping
To fix this, the 2 formats should be mapped to different nodes in the model!
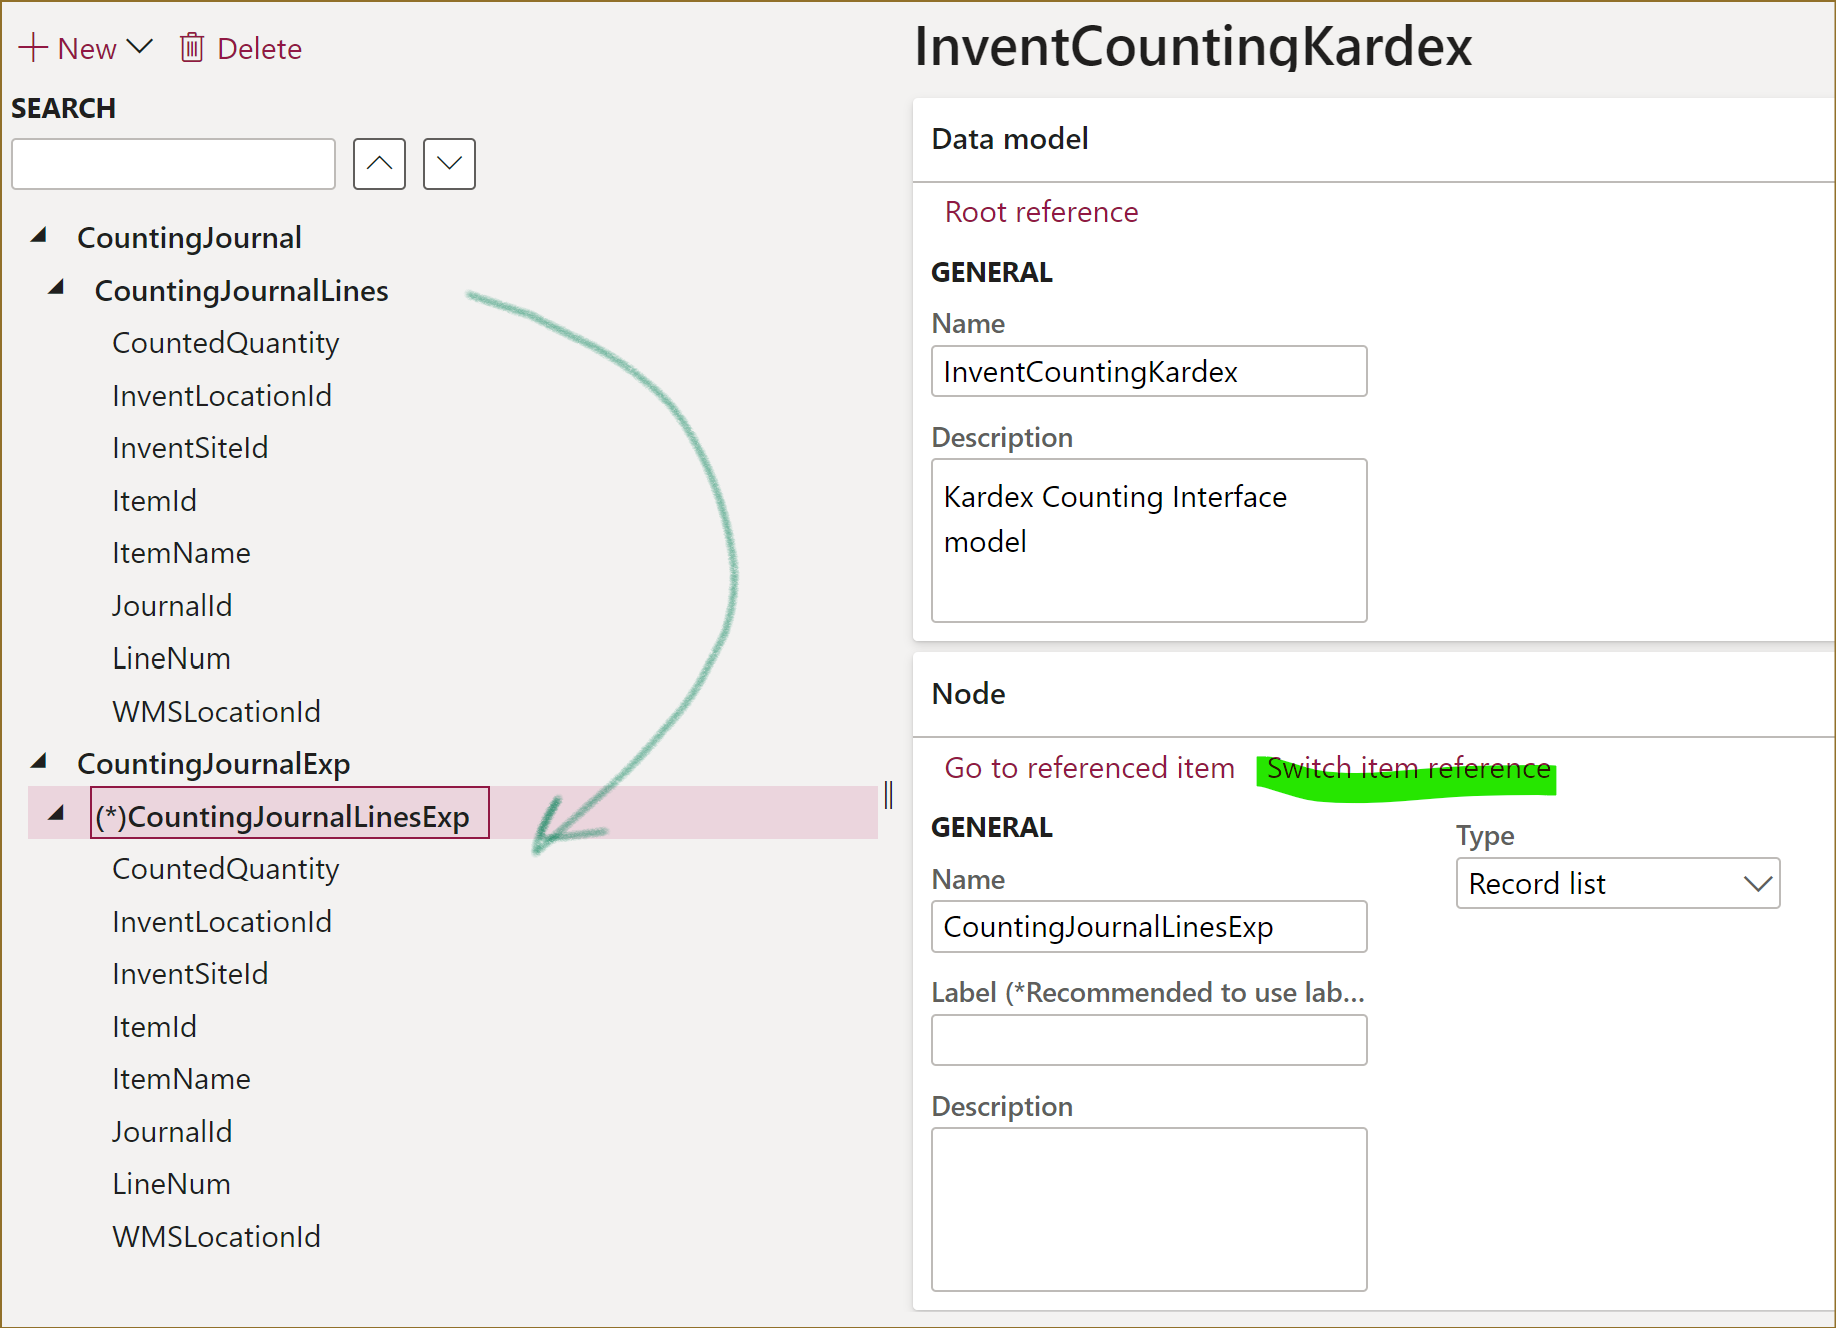
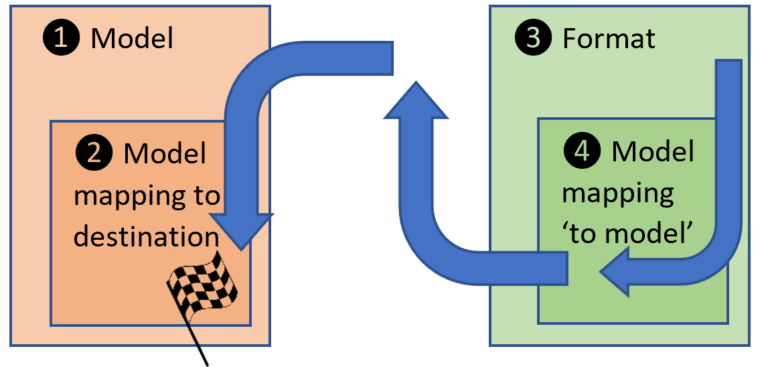
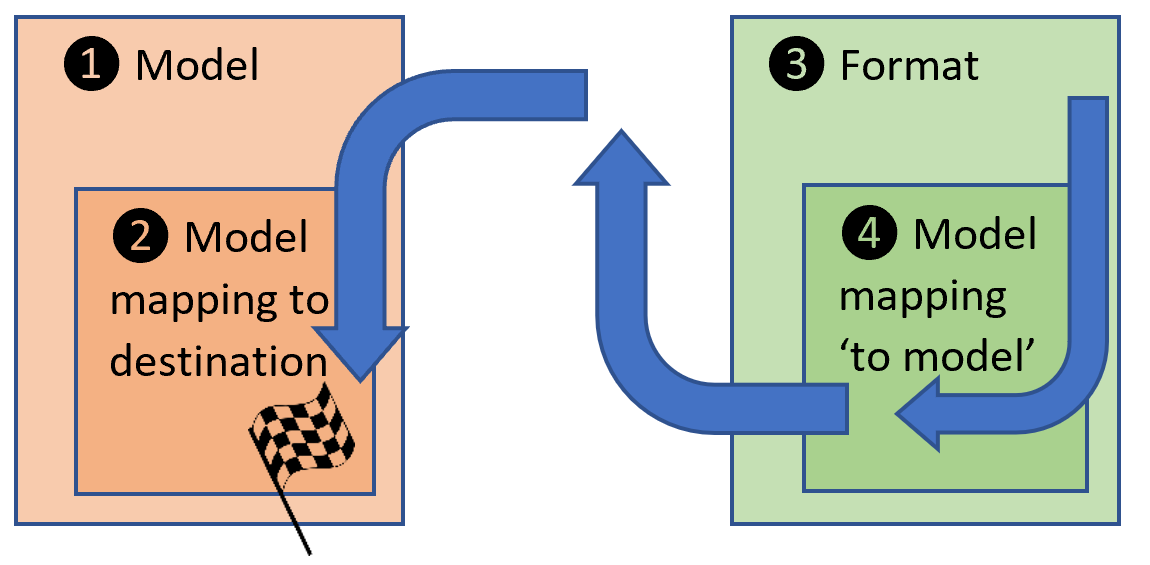
I’ve got a similar issue when I was trying to use the same model both for the export and for the import of data. There was a Counting journal model and 2 formats: Export to Kardex and Import from Kardex. There was a Counting model mapping for the export and a Counting model to destination mapping for the import.
Tried to run the export Export to Kardex and it asked to “Set one of the configurations as default“, which I did.
Then I tried to run the Counting model to destination mapping but it was not prompting any files for the upload, because a link between the inbound mapping to the import format was established through the model and it was pointing to the export format:
Model mapping to destination → Model [node] → Format
The trick is to use different nodes! The import format should write the data from the inbound file into one Record list in the model, while the export format should read data from another Record list in the model. The mappings then bind the same table to the one node and another, respectively. To reuse the data types and the structure, one node references the other (Switch item reference).
Electronic reporting blog series
Further reading:
Customer invoice falsifier for D365 for Finance
Amend GDPdU = GoBD = FEC
Enumerate lines in Configurable Business Documents
D365 Electronic Reporting: JOIN records in pairs
Electronic Reporting (ER) Cookbook 4: References in a model
Electronic reporting for data migration
Electronic Reporting (ER) Cookbook 3: Working with dates
Electronic Reporting (ER) Cookbook 2: new tips from the kitchen
Electronic Reporting (ER) Cookbook