

Introduction
Update 2023: The bundles in the sales order are gone, I have not been able to use them for a few months, because the Revenue recognition module may not be activated anymore: Removed or deprecated features in Dynamics 365 Finance – Finance | Dynamics 365 | Microsoft Learn
The Revenue recognition module acquired by Microsoft from Armanino LLC comes with some real-world goodies which do not necessarily have to do with the IFRS regulations but address evergreen Trade & Logistics topics. One of them is a bundling /de-bundling of products.
The problem is well introduced in an older popular blog of mine. In short, the customer is sold a bundle (e.g. the proverbial cat in the sack) with a total price. The customer doesn’t need to know exactly what a single cat costed versus a single sack. Internally the revenues still need to be allocated among the products.
The solution (3) described in the blog is exactly what was implemented in Dynamics 365 in August 2019: an automatic BOM explosion for kits/bundles. The exploded components in the sales order are posted individually into the General Ledger – all with their unique GL accounts and accounting rules – while the sales invoice obscures the details and only presents the bundle and the total price to the customer.
You have to enable the Revenue recognition module first, which is available but hidden in all versions since Dynamics 10.0.5. Check out this source to learn how to do it.
Step by step
Once the module is activated, a new checkbox Bundle appears prominently on the General tab on in the Released product form: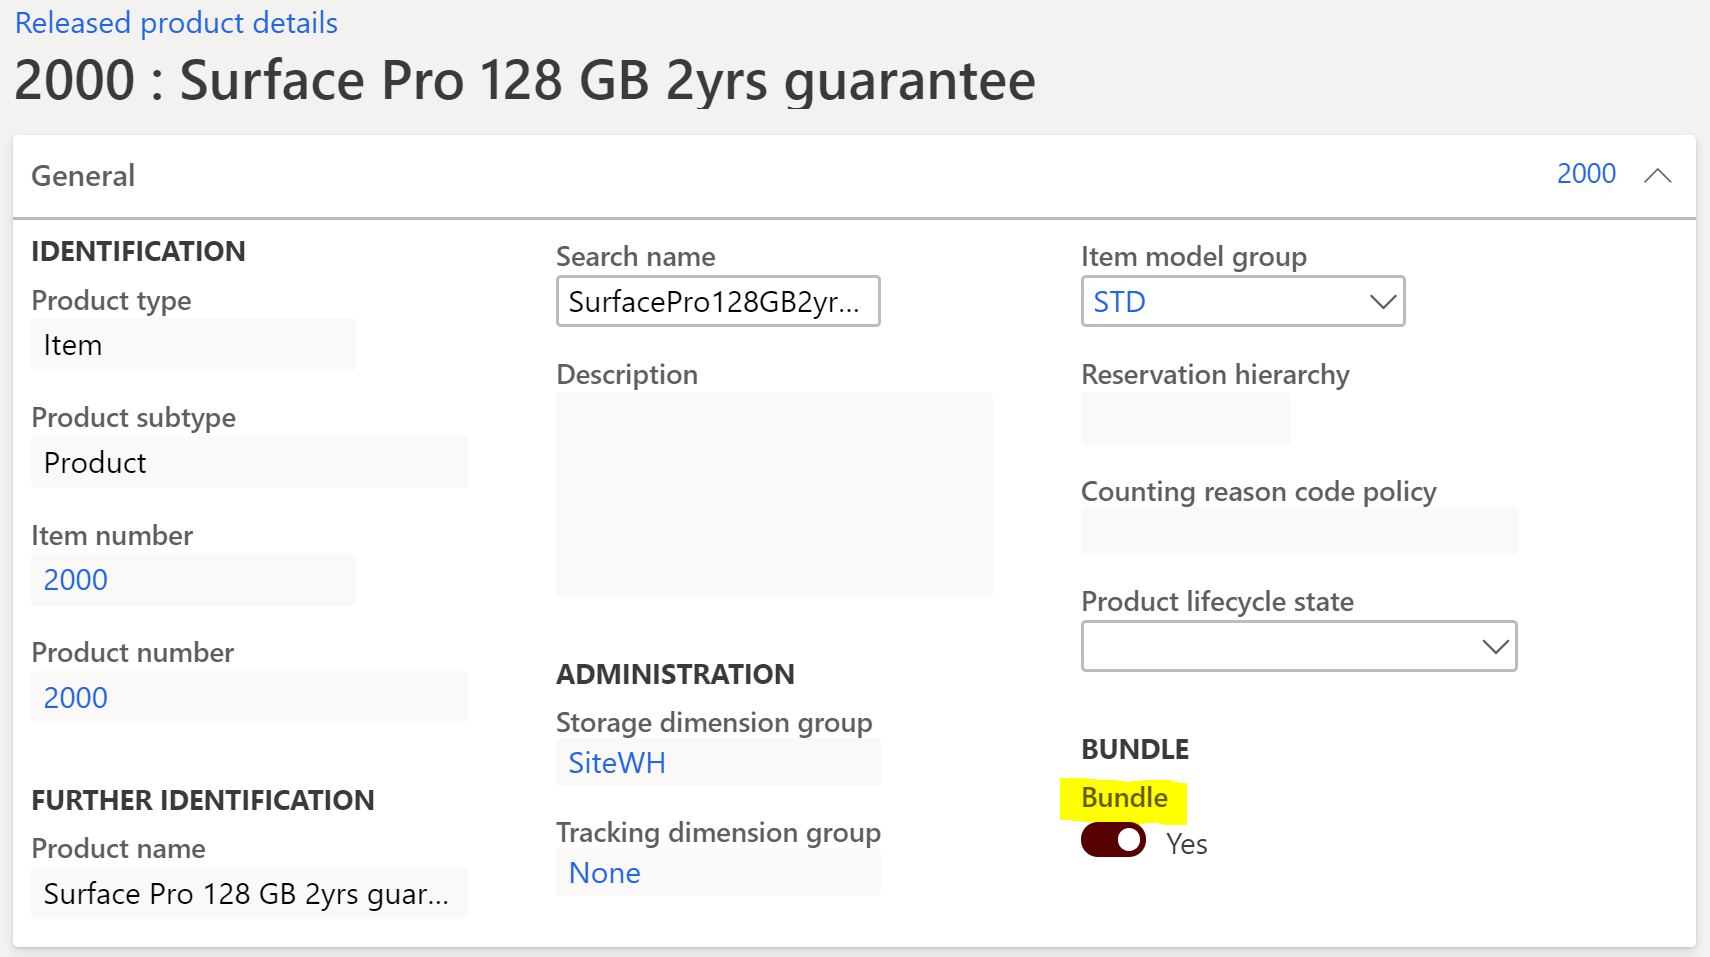
A bundle item must be stock-able, it must be marked with the Bundle = Yes, and it must possess an active and approved bill of material (BOM) with the components inside. The bundle components may be either tangible products or services items, yet those must be stock-able too: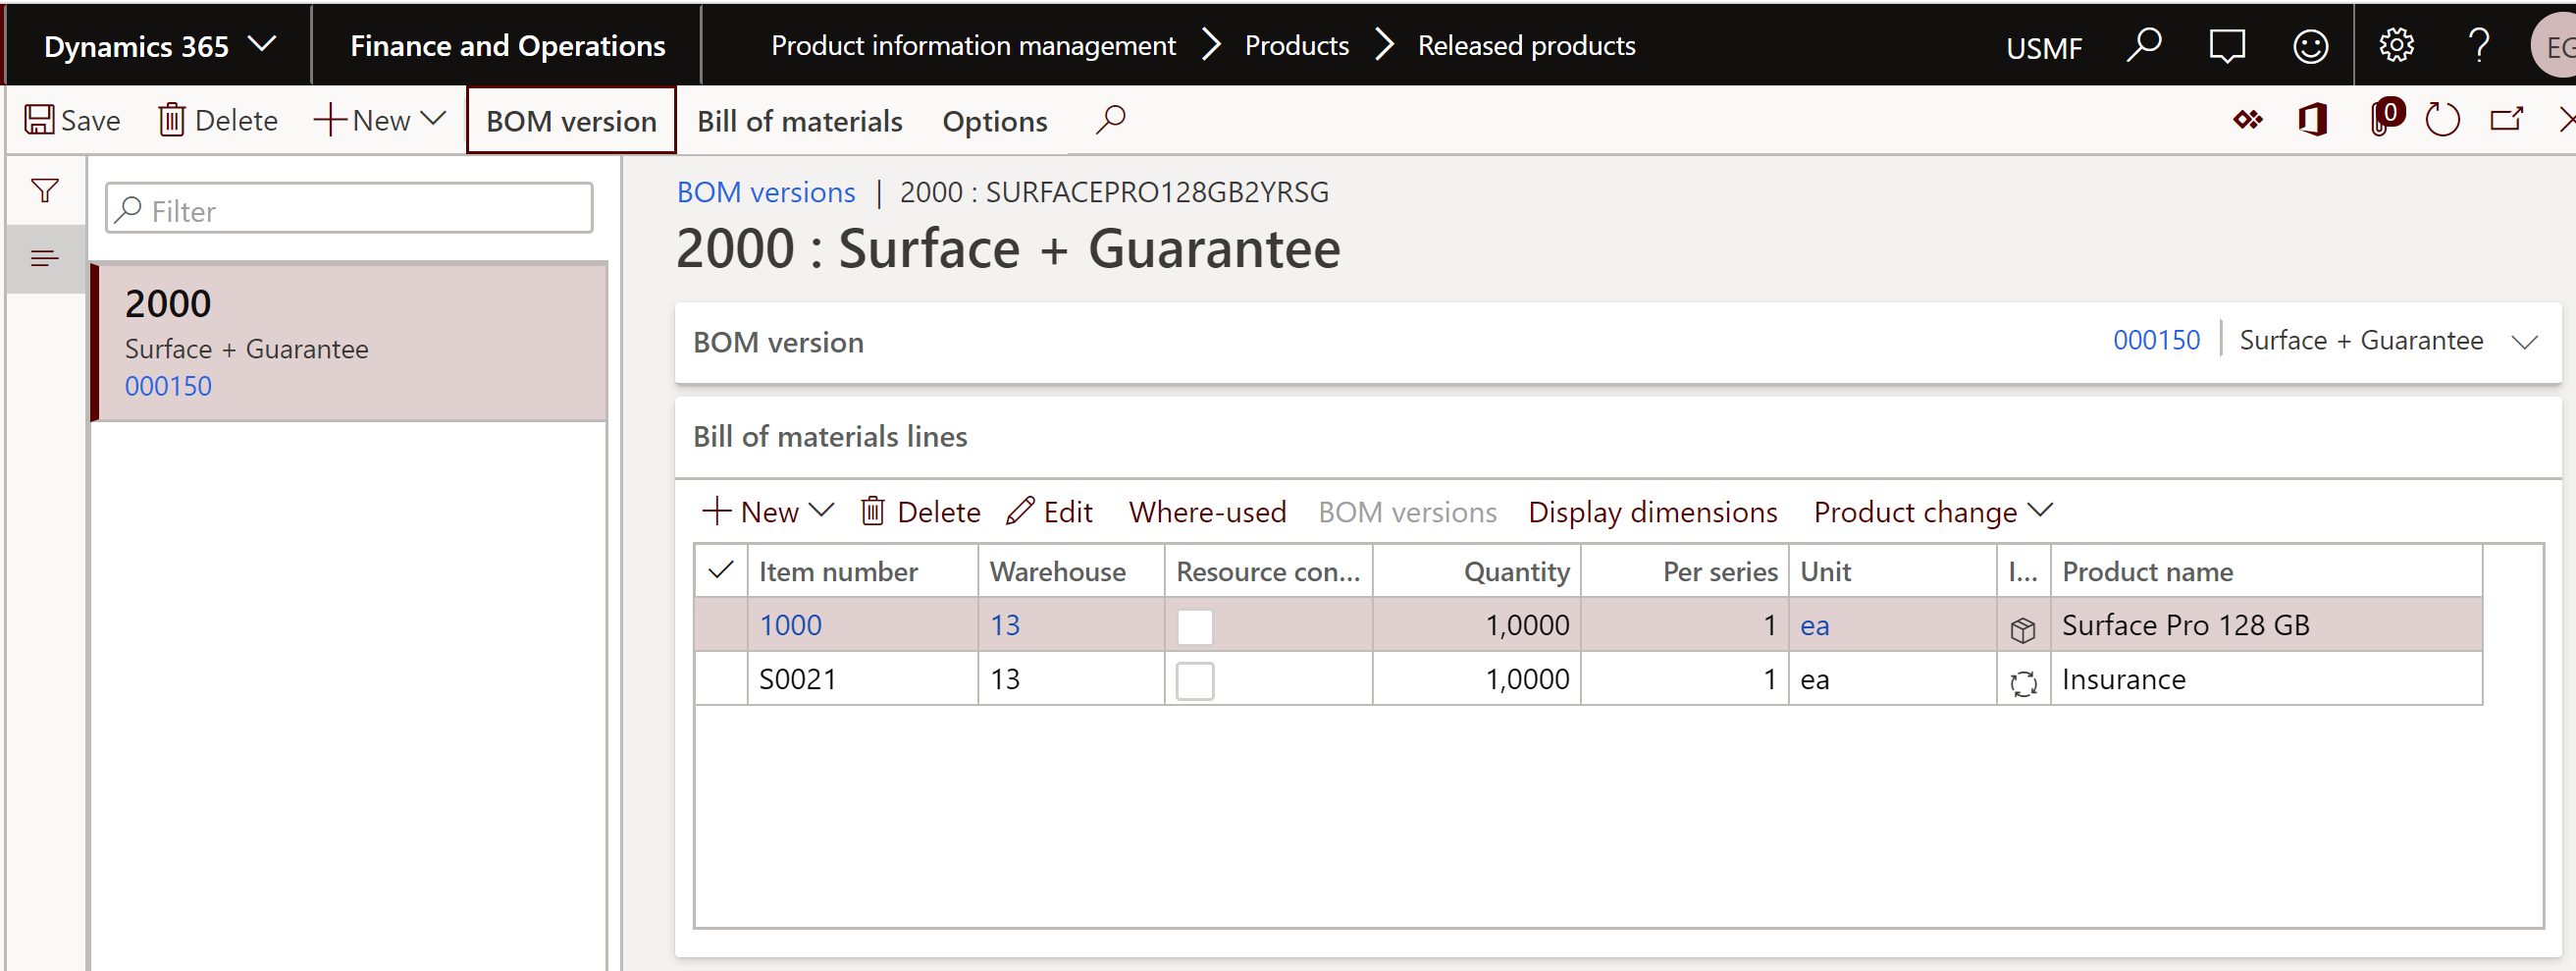
The bundle item is then added to the sales order normally: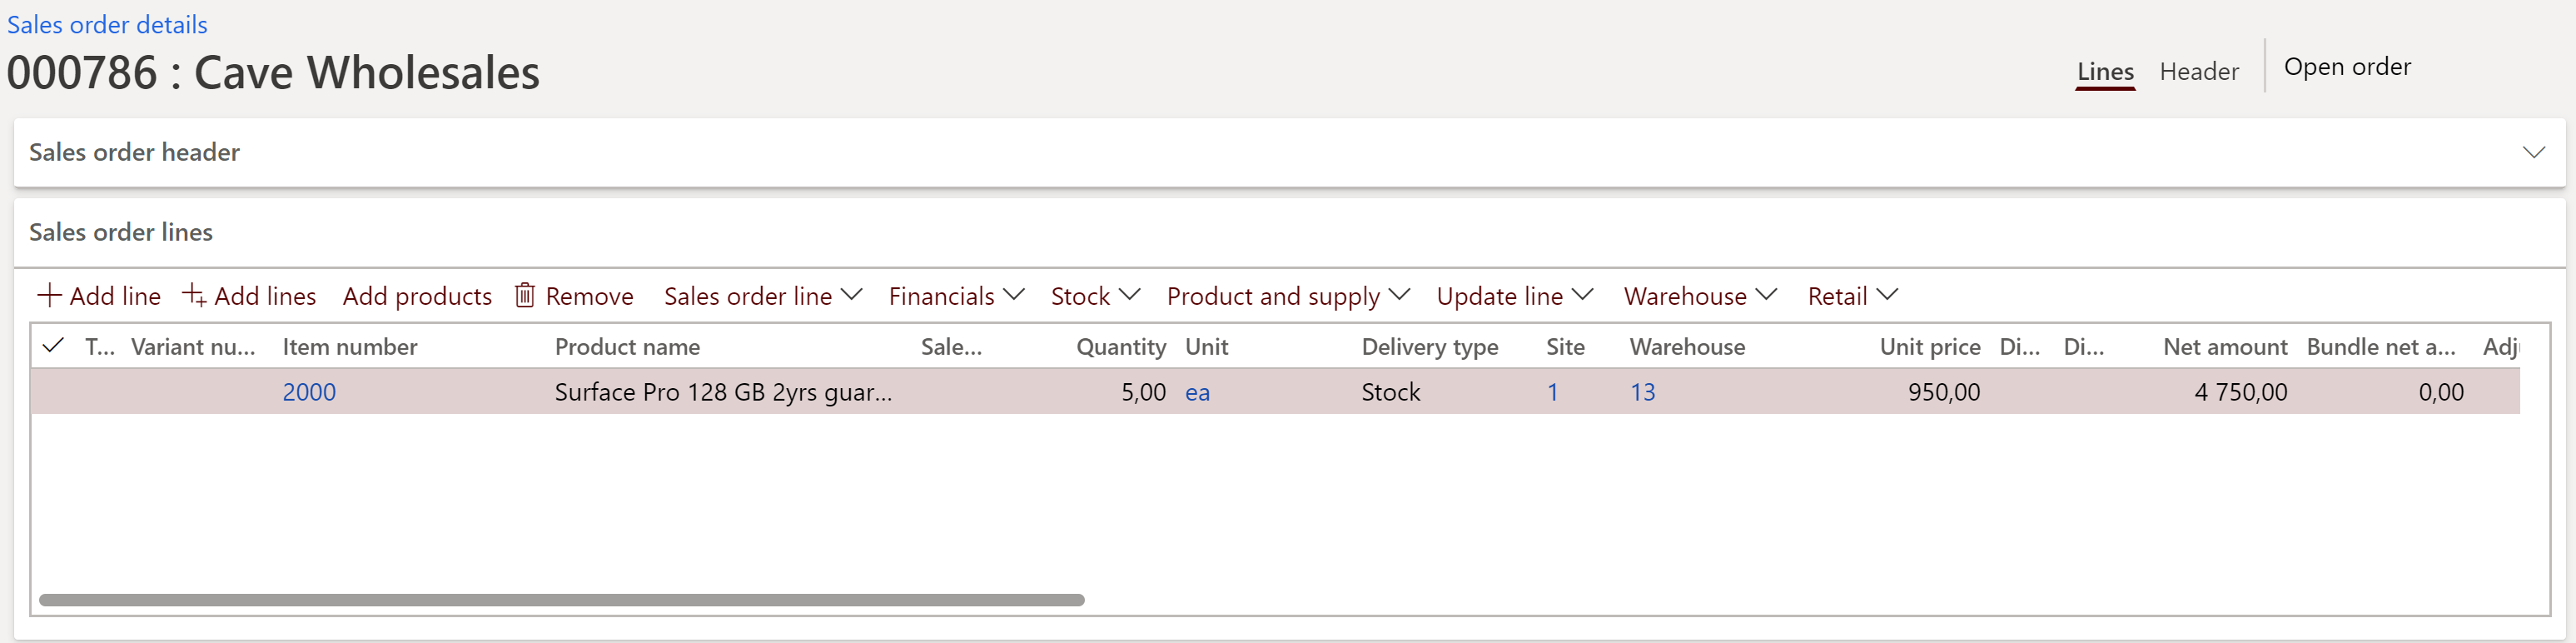
The BOM of the bundle is automatically exploded whenever a sales confirmation is posted (to be honest, this is not ideal as we encourage our users to preview sales confirmations first).
The stock parameters, VAT settings etc. are taken from the individual components’ item master. This can be both right and wrong: in the case of a hypothetical ‘chicken in the sack’ the VAT rate for the chicken may indeed differ from the sack. However, in the case of a supplementary service (e.g. transportation) the service shares the fate (i.e. the tax rate) of the master product being shipped, according to the European legislation.
The total bundle price (note the Bundle net amount column far to the right) is allocated to the components in the ratio of their quantities in the BOM and the standard sales prices (not ideal, as the price of a component may vary). The divisor is the total of all components’ (sales prices * quantity) found in the BOM.
In the below example, the promotional sales price of 950 USD for a “Surface Pro tablet with an extra guarantee” is split at the ratio of 899*1/99,89*1 = 9:1 between the tangible Surface SKU and a service item: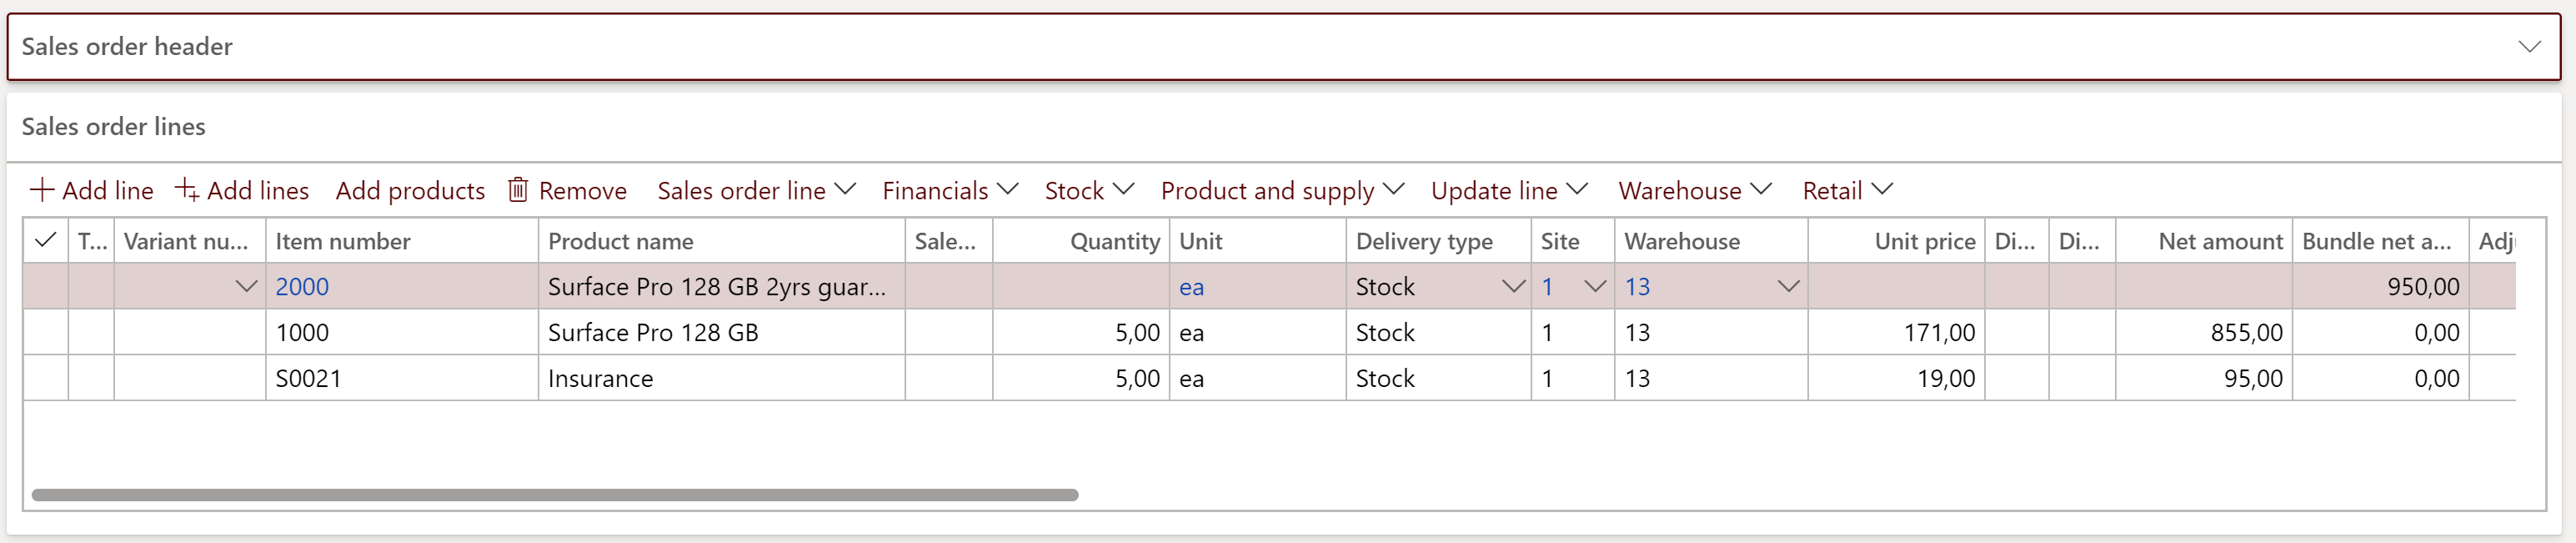
Obviously, the bundle components are picked individually by the Warehouse management, which stands out in comparison to a Retail kit i.e. a “kit from the stock” scenario.
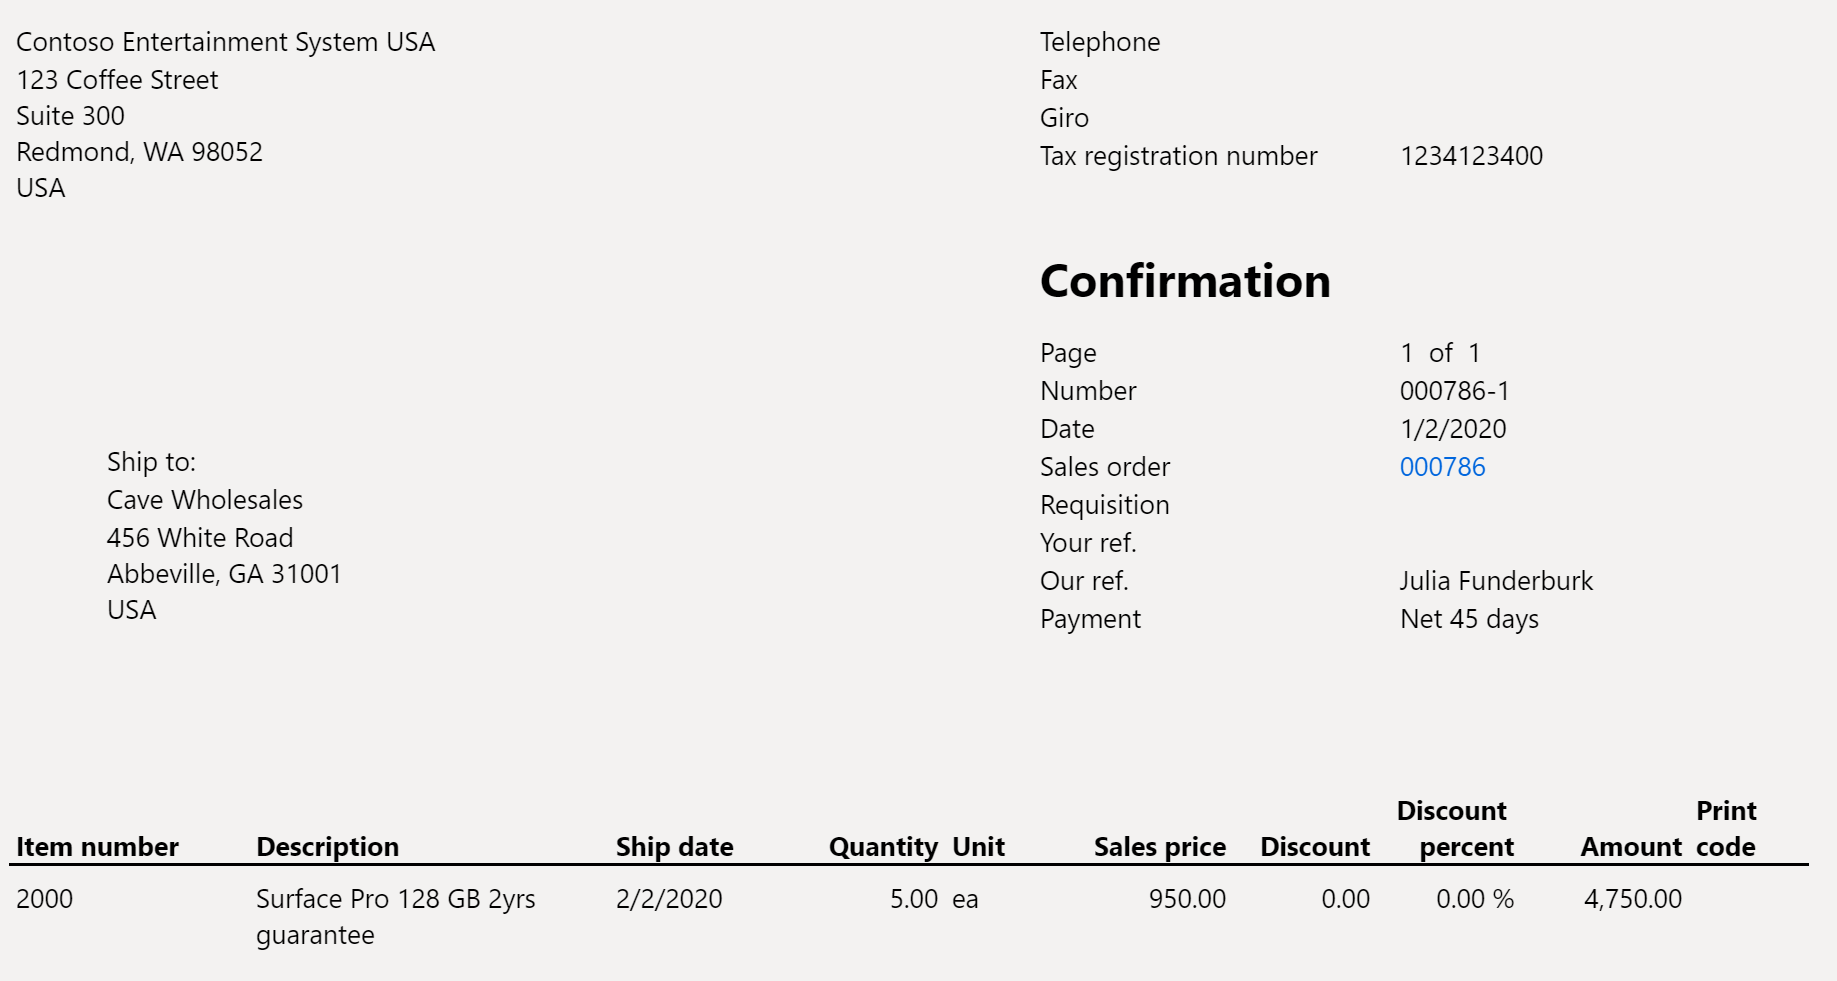 The sales confirmation and the sales invoice printouts only show a summary line with the master bundle item and its description:
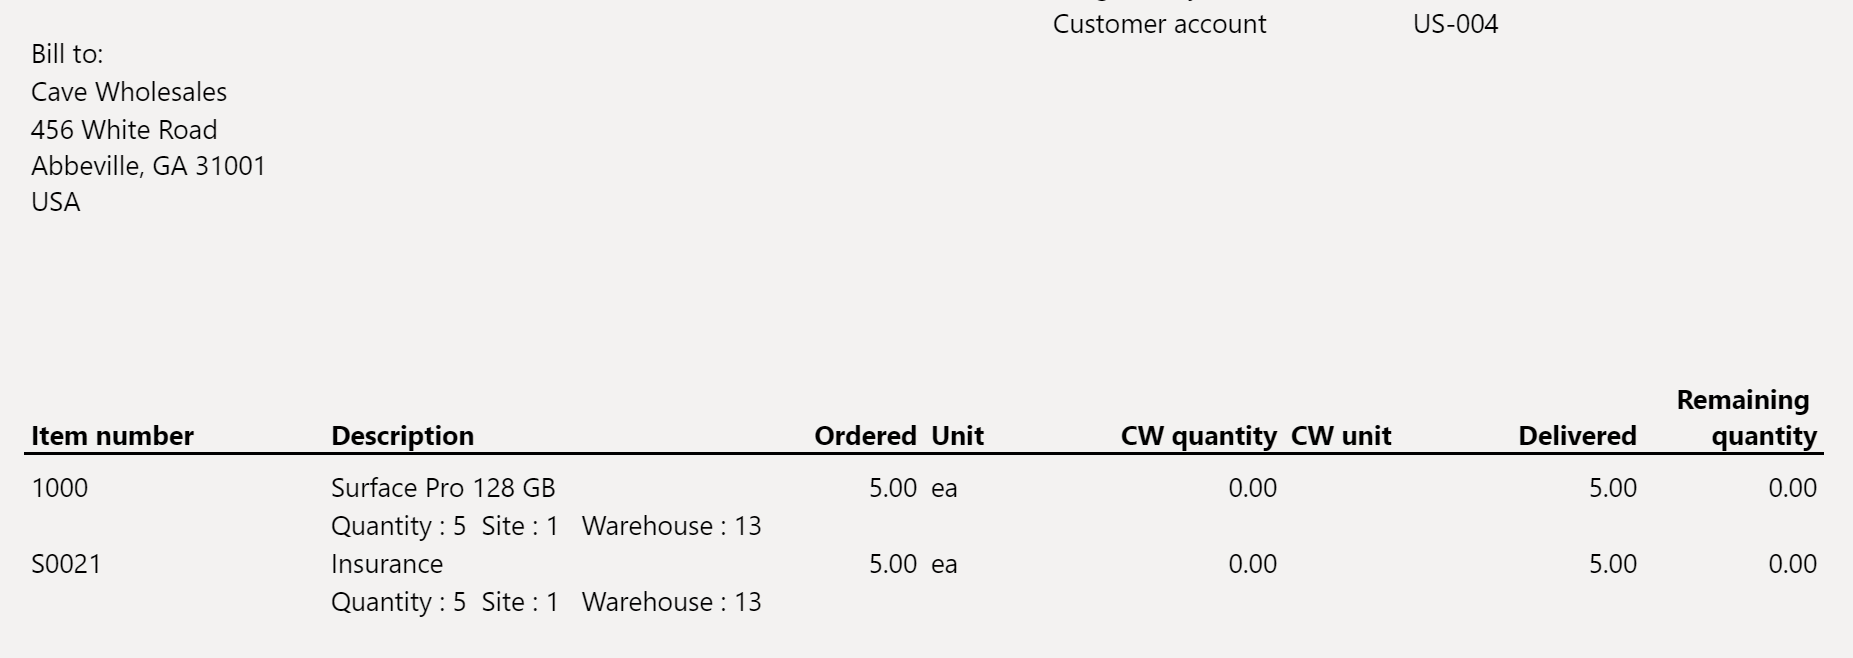
In contrast, the Delivery note (aka Packing slip) contains all the lines (to remove intangible service lines from the delivery note one may use the classic Quantity = Picked only mode):
This makes sense, as the Delivery note (repurposed to a Commercial invoice) may need to be presented to the customs authorities on export/import operations.
 That said, the bundles are well supported in the sales business documents, but not necessarily in the T&M or PSA project invoices.
Conclusion
A bundle/kit explosion T&L functionality implemented by partners myriad times through a customization is now available at the D365 Finance / SCM application core, which is great news. Yet the Revenue recognition module has more to offer: how about an accrual of the revenue from the above guarantee service? Check out the upcoming blog.