Make yourself an Admin in Dynamics 365 Fin/SCM

Make yourself an Admin in Dynamics 365 Fin/SCM

How many times have you been given a VM for D365FO development, but no interactive user in the local Web application? You can program X++ code, you can build, but you cannot test. The AdminUserProvisioning tool on the desktop requires local Administrator rights, which is a separate account on new cloud VMs. Fortunately, with an access to the SQL server you can make yourself an Admin.
In essence, the trick is the same as in the past: update the USERINFO table.

  1. Secure an access to the AxDB database in the Microsoft SQL Management Studio. Recent VMs may require a separate admin account, e.g.
    RUNAS /user:Administrator@builtin "C:\Program Files (x86)\Microsoft SQL Server\140\Tools\Binn\ManagementStudio\Ssms.exe"
  2. Connect to the AxDB database and locate the USERINFO table, then Edit top 200 rows, find and start editing the Admin record. You may also use the SQL pane to pass the below command:
    SELECT ID, NAME, ENABLE, SID, NETWORKDOMAIN, NETWORKALIAS, DEFAULTPARTITION, EXTERNALUSER, EXTERNALID, IDENTITYPROVIDER, OBJECTID FROM USERINFO WHERE (ID = 'Admin')
    There will be most likely 4 Admin records, the last 3 non-interactive logons are created by the D365 Object server automatically and may have the SID = S-1-5-20 (NT AUTHORITY). We only need to edit the 1st – interactive – account:
    SQL UserInfo table
  3. As in the past (Dynamics AX 2012), the SID is the most important. The easiest way to deduct this ID and other information is to copy and paste it from another cloud environment you have an access to, for example via the table browser: https://xxx.yyy.operations.dynamics.com/?mi=SysTableBrowser&tableName=UserInfo
    UserInfo in the Table browser
  4. Update the following fields in the target record:
    ColumnRemark
    SIDS-1-19-123456789-1234567890-1234567890-1234567890-1234567890-1234567890-1234567890-1234567890-1234567890-1234567890
    The long SID is a unique identifier of your user in the Azure Active Directory (see also “Immutable ID”). It it sufficient to only replace it in the 1st [interactive] logon out of 4.
    NETWORKDOMAINhttps://sts.windows.net/
    This one looks most probably https://sts.windows.net/ but may also be like https://sts.windows.net/erconsult.eu or even https://erconsult.eu/ and refers to the Azure tenant. Apparently, the syntax depends on who owns the tenant and whether your AAD is trusted by the AAD of your client.
    NETWORKALIASname.surname@yourdomain.xyz
    This is your [e-mail] account in the Office 365 tenant.
    DEFAULTPARTITION1
    Set to “1”.
    IDENTITYPROVIDER“”
    This can be the same https://sts.windows.net/ or a https://sts.windows.net/ab123456-123a-456b-789c-abcde1234567/ address, where the GUID at the end is the tenant id of your Office 365 subscription (see https://www.whatismytenantid.com/). From experience, you may keep it blank.
    OBJECTIID“”
    This seems to be a GUID of your user in the Active Directory. Keep it blank, the system populates it on the first logon automatically.
    EXTERNALUSER
    EXTERNALID
    0
    “”
    Whatever that is, you can keep the 2 columns empty. Upon the first logon the system is going to set EXTERNALUSER = 1, and EXTERNALID = some alphanumeric value.
  5. Update the USERINFO record and try to connect to the D365 Web application. Experiment with the SID and the NETWORKDOMAIN if it doesn’t work.

Input validation and messaging in the Process Guide Framework

Input validation and messaging in the Process Guide Framework

A few words of introduction: Process Guide framework is THE framework for new Warehouse management mobile screens and menu items in “Dynamics 365 Supply Chain Management”:
…/warehousing/process-guide-framework

I find that the topic of the validation of data entered or scanned by the user is very superficially covered. When you read the above shallow documentation you may think the ProcessGuideStep.isComplete() method is a good place to give an error, but it is NOT. It would be too late: by the time the execution reaches isComplete() the user input has already been processed, accepted and serialized in the session state aka “pass” WHSRFPassthrough.

I figured out that the true validation may be programmed at 2 places: in the process() method of a class derived from the WHSControl or in the ProcessGuideStep.validateControls() method. The 2 ways require slightly different techniques and have distinct flavours:

WHSControl.process()

Inheriting the WHSControl class offers an object-oriented alternative to extending the WHSRFControlData class (this spaghetti code has been recently refactored and moved to WHSRFControlData.processLegacyControl). This technique is briefly described in the blog …/mfp/posts/extending-whs-adding-a-new-control-type .
There are pros and cons. The class is going to be used across the whole warehouse mobile app whenever you add a control with this name. This can be both good and bad:

  • The major disadvantage is that the WHSControl.process() is not triggered if the user has not entered anything into the field on the mobile device. E.g. one cannot check for an empty value, and this may lead to the “xxx is not found in the map” error message if one does not check existence of a parameter before fetching it from the “pass” WHSRFPassthrough.
  • The same validation logic is used everywhere. The code re-use is innate. This can be however too rough; for example, the below code snippet was written because the standard logic of the ProdID control was too broad: it was populating the item number and validating if it had a BOM.
  • The control is not fully aware of the context. It cannot reach the current Process Guide step object and call the Process Guide controller object back.
  • It is not fully aware of the surrounding controls either: the controls placed on the page after the current one have left no trace yet.
  • The control class can leverage the WHSRControlData instance with all its perks and shortcuts.

In WHSControl.process() you take the user entry from the parmData() and return a false result with the this.fail() method:

				
					#WHSRF [WhsControlFactory(#ProdIdLabel)]
public class WHSControlProdId extends WhsControl
{
    public boolean process()
    {
        boolean ok = super();
        ProdId prodId = this.parmData();
        fieldValues.insert(ProcessGuideDataTypeNames::ProdId, prodId);
        if (! ProdTable::exist(prodId))
        {
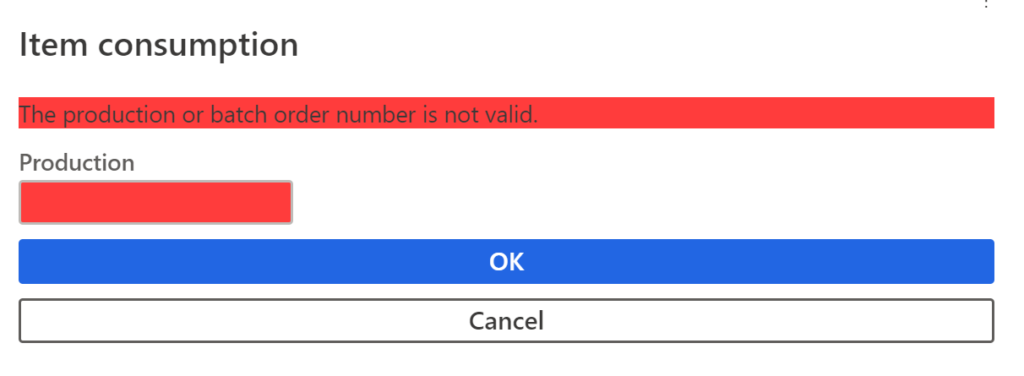
            ok = this.fail("@WAX1162"); // The production or batch order number is not valid
        }
        return ok;
    }
}


Note that you have to care about parsing the entry and storing it in the fieldValues container. On an error, the processing stops, the page reloads and the error message(s) is shown:
WHS warning

ProcessGuideStep.validateControls()

The validation in the ProcessGuideStep class has a different quality:

  • One can check for empty (mandatory) data.
  • The logic can only be re-used in a menu item made in the Process Guide framework. Such menu items are too few. You re-use the logic by adding the whole step = screen to the process flow.
  • The step has a full access to the process controller and to the preceding step results.
  • All controls are validated at once and can be checked for mutual consistency.
  • The WHSRControlData instance with all its useful methods has already been disposed of by the time execution reaches the validateControls() method. You have to write most of the business logic from scratch.

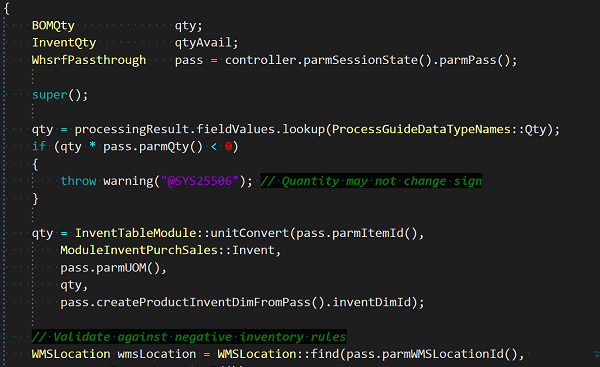
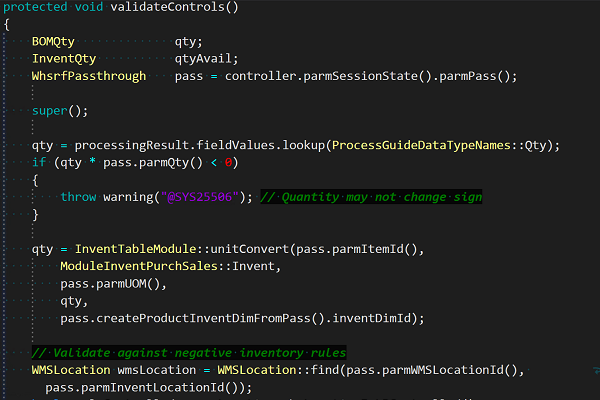
The validateControls() method is executed before the fieldValues container is merged with the “pass” container (WHSRFPassthrough) and becomes available to the mobile application. This is why you take the user entry safely from the processingResult.fieldValues structure. If you encounter an error, you throw a warning:

				
					[ProcessGuideStepName(classStr(ProcessGuideItemConsumpPromptQtyStep))]
class ProcessGuideItemConsumpPromptQtyStep extends ProcessGuideStep
{
    protected void validateControls()
    {
        WhsrfPassthrough pass = controller.parmSessionState().parmPass();
        super();
        qty = processingResult.fieldValues.lookup(ProcessGuideDataTypeNames::Qty);
        if (qty * pass.parmQty() < 0)
        {
            throw warning("@SYS25506"); // Quantity may not change sign
        }
    }
    protected ProcessGuidePageBuilderName pageBuilderName()
    {
        return classStr(ProcessGuideItemConsumpPromptQtyPageBuilder);
    }
}


The warning thrown interrupts the flow, re-loads the page and presents the warning.

Success message

A related topic is an ability to present a success message to the user at the end of the process execution. You do it at the end of the doExecute() method in the process guide step:

				
					protected void doExecute()
{
    super();
    // do the work
    this.addProcessCompletionMessage();
}


This implementation is very limited, however: it cannot uptake a custom message and always shows the same text “Work Completed”.

The below snippet is smarter:


ProcessGuideMessageData messageData = ProcessGuideMessageData::construct();
messageData.message = strFmt("@SYS24802", journalId); // Journal cannot be posted...
messageData.level = WHSRFColorText::Warning;
navigationParametersFrom = navigationParametersFrom ?
                              navigationParametersFrom :
                              ProcessGuideNavigationParameters::construct();
navigationParametersFrom.messageData = messageData;


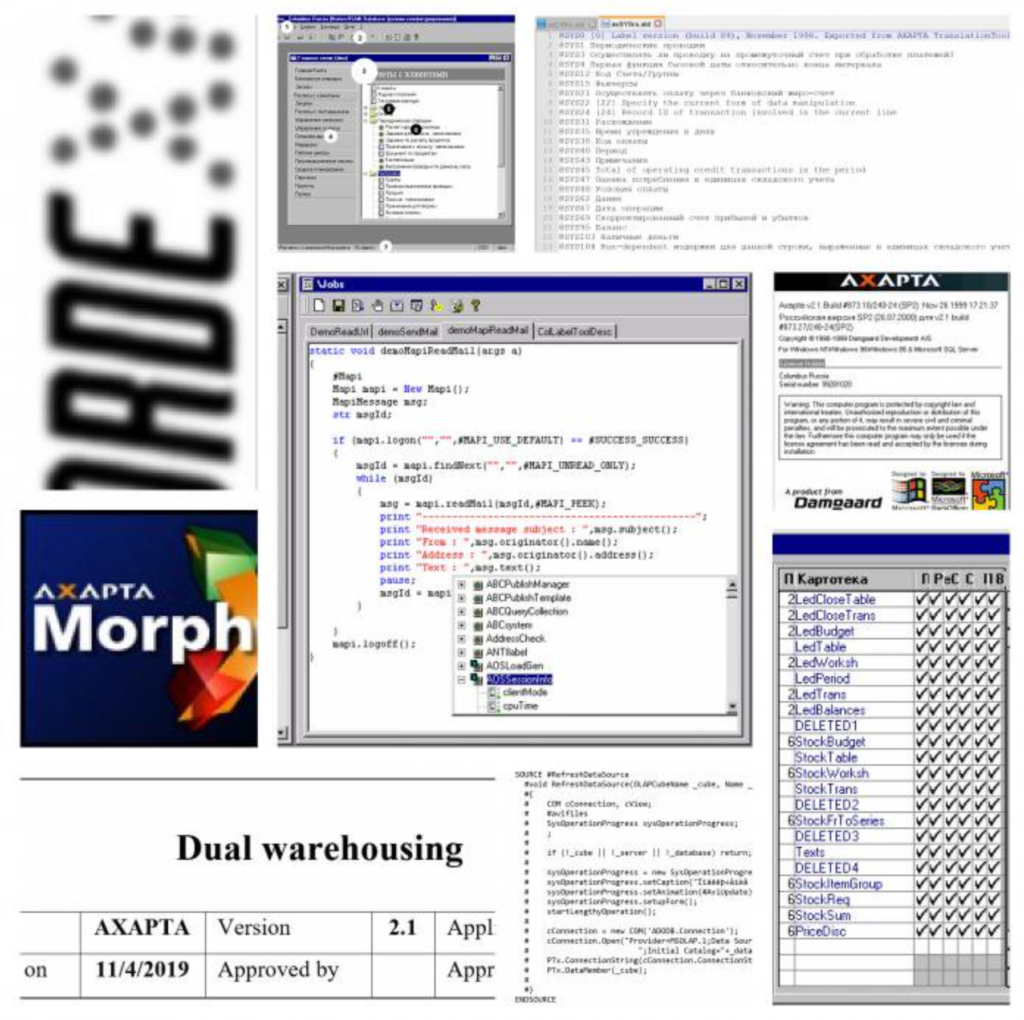
20th anniversary

20th anniversary

20-5-3 is my formula for this year: log₂₀₋₅(2019) ~ 3  
  • 20 years in the ERP business, started with Damgaard Concorde XAL
  • 5 years with the cloud Dynamics 365 for Finance and Operations
  • 3 years independent
It is hard to imagine myself the youngest member of a team, first translating Axapta 1.5 interface then writing solid X++ code just a year later. Today I feel more like one of the COBOL grannies: antiquated, indispensable, expensive 😉