Assistance and Secondary operations in D365 for SCM to separate machining costs from labour

Assistance and Secondary operations in D365 for SCM to separate machining costs from labour

In Dynamics 365 Supply Chain Management (SCM), in its recent internal MES incarnation called “Production Floor Execution” (PFE), there is a notion of Assistance.

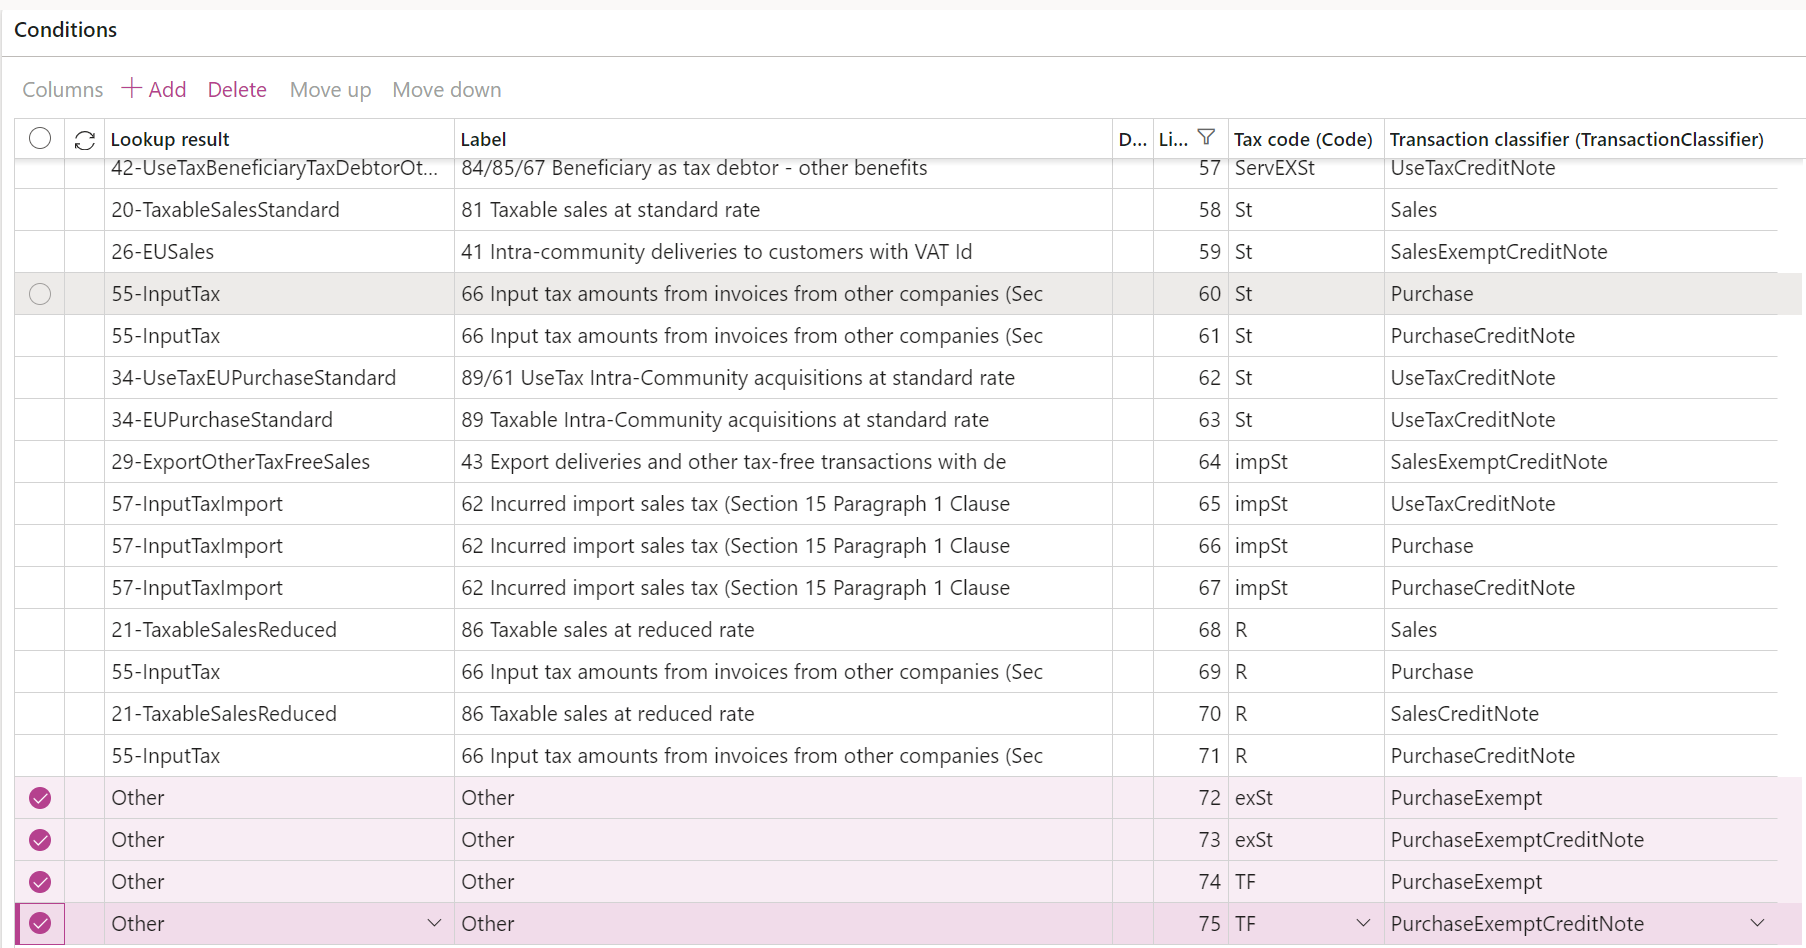
The Assistance model helps solve a controlling challenge: recording machine costs and labour costs separately. For example, setting a machine up consumes less energy than a full speed machine operation: during the setup job, the labour cost prevails if we neglect the amortization. On a contrary, once a highly automated work cell is programmed and set up, the worker may leave and let the cell run on its own. The machine cost prevails. Consequently, instead of a blended rate of the machine hour, we may decide to split the hours into 2 different route categories: one for the machine, one for the worker, and even one more for the energy consumption.

Assistance is when multiple workers share one job. A lead worker (pilot) is assigned the production order job, and other workers join as assistants. The Pilot’s time is replicated into the Assistant’s time records, thus increasing the labour cost per item: N workers : 1 order.
In contrary, if workers handle several production orders at once it is called bundling. This mode shares labour costs across orders, lowering the cost per item: M orders : 1 worker. In a general case, the relation between the orders and workers may be M:N, if a team of assistants takes on a bundle of production orders.

Primary vs. Secondary operations

In Dynamics 365, production steps are called operations. Some operations are “primary”, meaning they control the main task, usually involving a machine or workstation. Others are “secondary”, like additional labour or support roles, running alongside the primary task. Primary and secondary operations share the same operation number but have different Operation IDs in Dynamics 365. They both run at the same time, and the primary operation controls how long the job lasts.

The key is, secondary operations allow for distinct cost recording for personnel assisting a machine operation. These can help track labour costs separately and in real-time.
 

Setting up secondary operations for labour cost tracking

  1. Define distinct Production control > Setup > Routes > Cost categories for the machining and for the labour.
  2. In Production control > Setup > Routes > Route groups, create one group and activate the Setup and/or Process jobs appropriately. Check Job management and Capacity to make the jobs visible on the PFE terminal. Turn on the Setup time and/or Run time estimation and costing.
  3. Define secondary operations in the Route: specify the main machine task as the primary operation and the labour support task as the secondary.
  4. In Production control > Setup > Manufacturing execution > Configure production floor execution, choose Design tabs and make sure the button (Action) “Assistant” is placed onto one of the toolbars.
  5. Check if the system jobs Start assistance and Stop assistance exist under Time and attendance > Manage indirect activities > Indirect activities. Use Time and attendance > Setup > Wizards > Time and attendance configuration wizard if they don’t.
  6. Go to Production control > Setup > Manufacturing execution > Production order Defaults and check Assistants use secondary operations on the Operations tab. This setting lets assistants’ time be logged under the secondary operation, ensuring correct labour cost tracking.
  7. Make sure a dummy worker representing the machine exists alongside the real machine operator and they are activated for Time registration in the Time and attendance > Setup > Time registration workers.
  8. With the setup in place, Release a test production order.
  9. Open the Production control > Manufacturing execution > Production floor execution terminal, perform the initial configuration if needed. Choose the machine ID as a filter for the production jobs. 
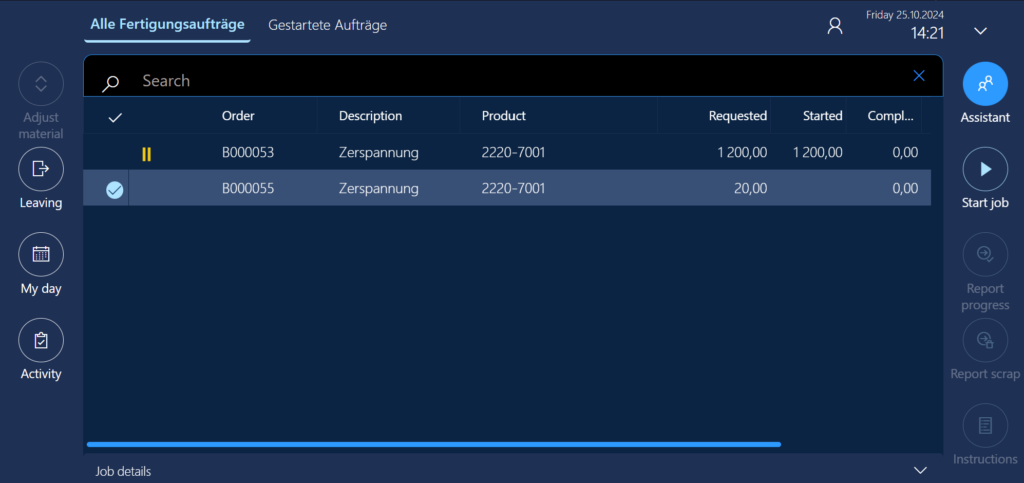
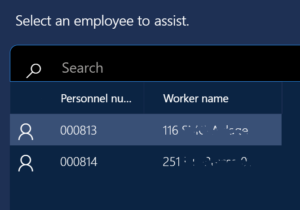
  10. Clock in the machine first with its fictive Badge ID. The PFE terminal opens the list of the primary jobs planned at the machine as shown on the screenshot above.
  11. Let the machine “Start job“.
  12. In a “shared terminal” scenario such as ours, the PFE terminal usually immediately logs the user=machine off, otherwise click Leaving / Log off.
  13. Log in as a human worker (machine operator) with your own Badge ID.
  14. Use the Assistant button on the PFE terminal to “attach” yourself as an assistant to the Pilot=machine.
  15. You will see a “You are now registered as an assistant” message right after. The machine becomes the “pilot”.
  16. Check Time and attendance > Inquiries and reports > Teams: there is now a Job pilot driving the primary operation and an assistant Worker attached to it.

The Resource pilot in this form is a remnant of a nice feature Assist Resource. The Assist Resource was supposed to be a machine or a similar asset acting as the Pilot instead of a dummy machine worker, making it simpler to track time. However, the corresponding button "Assist resource" is defunct on the modern PFE terminal: the necessary twin action "Start resource jobs" from the legacy Job card terminal is not implemented in the Production floor execution, so the Assist resource does not do anything useful.

  1. Check the time records of the day in the Time and attendance > Review and approve > Approve list: a Start assistance line has been recorded for the worker. The T&A module is quietly listening to everything what the pilot does:Start assistance
  2. After a while, Clock out the human worker.
  3. Check the time records in Time and attendance > Review and approve > Approve: the T&A module has now copied all the records of Pilot=machine to the Assistant during the active assistance period, yet the Process Job ID is not the same, it is the one of the secondary operation with its distinct cost rate! This does not work properly if you register route operations instead of jobs. Specifically, a Job level = Route is a no-go in Production order defaults.
  4. Check Time and attendance > Inquiries and reports > Teams again: the team is disengaged. If the worker mostly serves the same machine, you may activate Permanent teams in the Production control > Setup >  Manufacturing execution > Manufacturing execution parameters. This will auto-attach the human worker to the machine on subsequent clock-ins.
  5. At the end of the shift, assistants must clock out first: the Pilot can’t clock out until all assistants have done so. Indeed, you may now Clock out the machine.

Separate energy cost

In the above scenario, the human machine operator may come and leave at will, his or her working time is independent from the machine schedule. Recording a separate energy contribution is a slightly different, simple scenario.
Here we may use secondary operations, too. If we can attribute a certain volume of natural gas or electric energy to one hour of the machine’s operation or to a kilogram of the product / semi-finished product, then this overhead may be posted synchronously with every machine time/quantity route transaction.
 
Create a special Route group for the secondary operation. Deactivate Job management, because the electricity meter is not going to actively post its working hours. Turn on the Run time (=constant consumption in kWh per machine hour) or Quantity (=constant consumption in kWh per machined piece) in the Automatic route consumption group. Do it in sync with the Estimation and costing sliders.
 
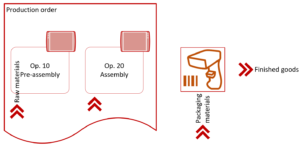
Assign this Route group to the secondary operation on the route. This will be the NRJ on one of the screenshots above.

Integrate APS with Dynamics 365 for SCM

Integrate APS with Dynamics 365 for SCM

APS means “Advanced Planning and Scheduling”. APS systems are used to optimize production processes by planning and scheduling manufacturing orders, taking into account factors like resource availability, machine capacity, and production deadlines. As a “better, smarter MRP”, APS helps companies improve efficiency, reduce lead times, and respond quickly to changes in sales or production orders.

In the German market, the 2 widely used programs are FELIOS from Inform-Software and HYDRA by MPDV. To be precise, their APS system is called FEDRA, with the HYDRA being a sister Manufacturing Execution System (MES). I had an occasion to integrate both with Dynamics 365 for SCM. By the way, a MES integration is something else and it already exists in Dynamics 365: Integrate with third-party manufacturing execution systems – Supply Chain Management | Dynamics 365 | Microsoft Learn.

High-level concept of the APS interface

An integrated APS uses data from the operations system, such as Dynamics 365 for SCM, including open sales, purchase, and production orders, current stock levels, and master data (BOMs, routes, resources, products and materials). All the data may be extracted from D365 with the standard or slightly modified entities.

The APS then generates an optimized production plan, often suggesting new raw material purchases and production orders, acting as a full-scale master planning system. However, we may neglect the planned order proposals and only import the updated production routes to align the ERP system with the APS. The process reduces to 5 steps:

  1. After the nightly D365 MRP run, the above data is exported as .TXT files, representing the day’s snapshot.
  2. APS loads these files, refreshes its database, and performs a planning run.
  3. Operators may adjust the plan in APS the day after.
  4. The final plan, with updated order and route dates, is exported as a set of inbound .TXT files.
  5. The production route file is used to update production route operations in D365 via a custom entity, since the standard one may only write to Created production orders.

The production route entity at step “5” is teased in another blog: “Import a D365 FO entity with a virtual KEY field“. The entity should skip rescheduling if the operation dates in the file match those in Dynamics 365 and only touch route operation/jobs in the following statuses: Scheduled, Released, Started.

Key step: adopt the APS route schedule

Once the route is updated with the start, end dates and times (the FELIOS system only knows the date), the “jobs” and other internal structures in Dynamics 365 must be aligned with the updated operation times. The necessary actions triggered by each line = route operation in the APS file are:
 
  1. Unlock the production order if it’s locked.
  2. Re-schedule jobs associated with the route operation, using the dates and times imprinted upon the ProdRoute record. This will update capacity reservations according to the new dates. As a positive side effect, this will adjust the start and end dates of the production order if the operation is the first or last in the route. It will also update raw material demand dates and times on related BOM lines in the production order.
  3. Lock the production order, protecting the scheduled route operation from further changes.
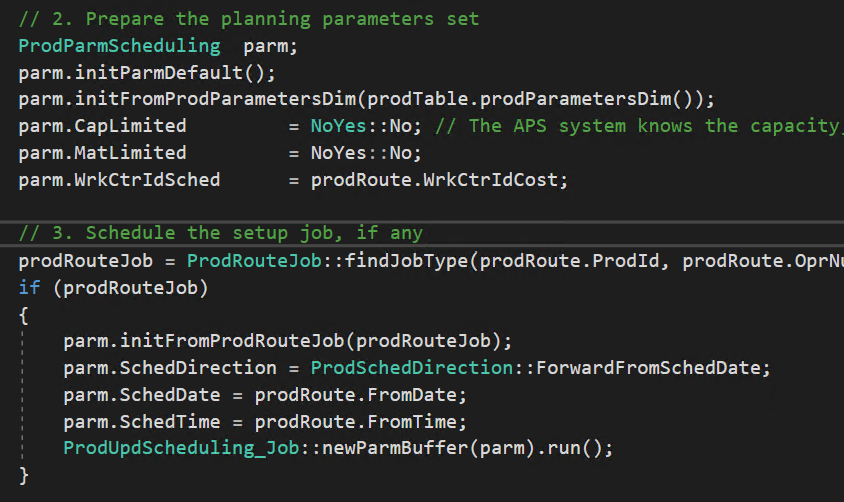
The below code snippet performs these key actions:
				
					    public void reschedule2jobs()
    {        
        ProdTable       prodTable = prodRoute.prodTable();
        ProdRouteJob    prodRouteJob;

        // 1. Unlock the order if locked
        if (prodTable.ProdLocked)
        {
            Args args = new Args(this);
            args.record(prodTable);
            ProdMultiLockForReschedule::construct(args).run();
        }

        // 2. Prepare a planning parameters set
        ProdParmScheduling  parm;
        parm.initParmDefault();
        parm.initFromProdParametersDim(prodTable.prodParametersDim());
        parm.CapLimited         = NoYes::No; // The APS system knows the capacity, resource, mat. availability better
        parm.MatLimited         = NoYes::No;
        parm.WrkCtrIdSched      = prodRoute.WrkCtrIdCost;

        // 3. Schedule the setup job, if any
        prodRouteJob = ProdRouteJob::findJobType(prodRoute.ProdId, prodRoute.OprNum, prodRoute.OprPriority, RouteJobType::Setup);
        if (prodRouteJob)
        {
            parm.initFromProdRouteJob(prodRouteJob);
            parm.SchedDirection = ProdSchedDirection::ForwardFromSchedDate;
            parm.SchedDate = prodRoute.FromDate;
            parm.SchedTime = prodRoute.FromTime;
            ProdUpdScheduling_Job::newParmBuffer(parm).run();
        }

        // 4. Schedule the process job
        prodRouteJob = ProdRouteJob::findJobType(prodRoute.ProdId, prodRoute.OprNum, prodRoute.OprPriority, RouteJobType::Process);
        if (prodRouteJob)
        {
            parm.initFromProdRouteJob(prodRouteJob);
            parm.SchedDirection = ProdSchedDirection::BackwardFromSchedDate;
            parm.SchedDate = prodRoute.ToDate;
            parm.SchedTime = prodRoute.ToTime;
            ProdUpdScheduling_Job::newParmBuffer(parm).run();
        }

        // 5. Lock the production order against any manual re-scheduling
        prodTable.reread();
        Args args = new Args(this);
        args.record(prodTable);
        ProdMultiLockForReschedule::construct(args).run();
    }


Remark: the highlighted line is used to change the work centre in the route operation. The APS system sends a new resource number, it is written directly into the route operation into the cost resource column. From there, the programme relays the changed resource number to the D365 planning core to reserve the capacity of the new work centre and de-reserve the capacity of the old.

Import a D365 FO entity with a virtual KEY field

Import a D365 FO entity with a virtual KEY field

I’ve got a case recently where a delimited text file had to be imported into Dynamics where a key field was a virtual one. Namely, an external APS system sent a single ProdOprNum of the record, whereas the respective ProdRoute table in Dynamics 365 for SCM has a composite key ProdId + OprNum. Pre-processing the file with an XSLT and splitting the column was not an option, because the Microsoft XSLT parser still does not implement the XSLT 2.0 standard and cannot uptake a text file.

The most important lesson to learn was that the – generally useful – guidance Use a virtual field to receive and parse an inbound field | Microsoft Learn did not work, because the system kernel started looking for the record to update BEFORE the compound key was parsed in the mapEntityToDataSource() method of the entity. It was not able to find the right record to update, which lead to an error later on.

The solution is as follows:

  • Follow the above guidance from Microsoft and create an entity with the key fields ProdId, OprNum (both mapped) and one unmapped virtual field ProdOprNum.
  • With a right mouse click, create or refresh the corresponding staging table.
  • Here comes the crucial part: remove any relation such as Staging.ProdId=Entity.ProdId && Staging.OprNum=Entity.OprNum from the staging table. You should do so every time you refresh the staging table, D365 will namely re-create it over and over again. As a side effect, the Data management will think you insert the records while in reality the record is updated, but this does not matter.
  • Implement the splitting in the initializeEntityDataSource(), select the right record to update and plant it as shown below:
				
					 public void initializeEntityDataSource(DataEntityRuntimeContext _entityCtx, DataEntityDataSourceRuntimeContext _dataSourceCtx)
{
	super(_entityCtx, _dataSourceCtx);
	
	switch (_dataSourceCtx.name()) 
	{
		case dataEntityDataSourceStr(ProdRouteSchedEntity, ProdRoute):
			ProdRoute prodRoute = _dataSourceCtx.getBuffer() as ProdRoute;
			if (prodRoute)
			    break;
			    
			this.ProdId = substr(this.ProdOprNum, 1, 10);
			this.OprNum = any2int(substr(this.ProdOprNum, 11, 14));
			
			prodRoute = ProdRoute::find(this.ProdId, this.OprNum, RouteOprPriority::Primary, true);
			_dataSourceCtx.setBuffer(prodRoute);
	}
}