Under the “reverse charge system” it is the company receiving the service that is liable to pay the VAT, and not the company providing the service. Normally, the net amount of VAT to pay is offset by the same amount of the receivable VAT, and the tax burden remains 0. But not always: sometimes the tax office wins. These are 2 common cases:
-
- A service was provided by an EU entrepreneur who had no EU VAT number. The invoice was VAT excluded, but I had to calculate the VAT payable (reporting code 1157 „Steuerschuldübergang bei Bezug gemäß § 19 Abs. 1 zweiter Satz, § 19 Abs. 1c“ in Austria, code 47 „Steuer, im Inland steuerpflichtige sonstige Leistung eines EU Unternehmers § 13b Abs. 1 UStG“ in Germany), while the VAT receivable was nil (otherwise reported as 1166 „Vorsteuer: Steuerschuldübergang gemäß §19, grenzüberschreitende Leistungen“ in Austria or code 67 „Vorsteuer aus Umsätzen nach §13b Abs. 2 Nr. 11“ in Germany).
- In the case of the self-billing (Gutschriftverfahren) a foreign agency may pay money to an entrepreneur by issuing an invoice on her/his behalf. If the entrepreneur does not have a VAT registration, or it is a small business, the VAT receivable cannot be recognised and the entrepreneur becomes liable for tax. If you register the agency as a customer it is a no-brainer, but the problem is in the non-continuous invoice number issued by the agency.
Solution in Dynamics 365 for Finance
The common business process distils into 3 steps:
– One receives an invoice (or a self-billed credit note) from a supplier (vendor) over €100
– One pays €100 to the supplier (or becomes €100 from the supplier)
– One pays €20 (or €19 in Germany) to the tax office
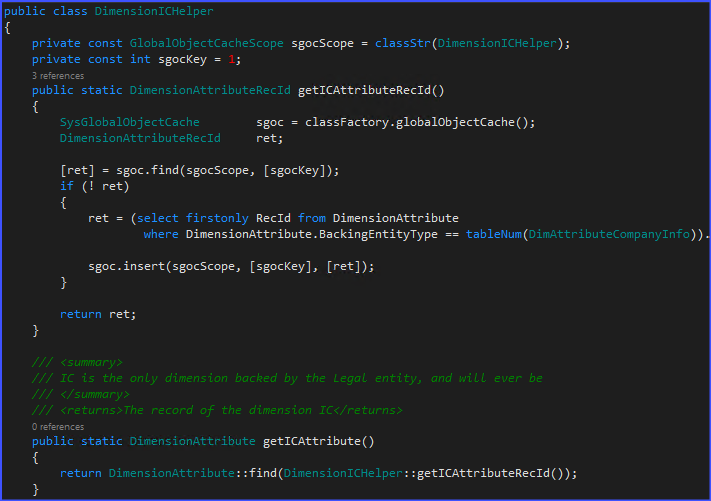
To implement this in Dynamics 365 for Finance, we activate the Use tax in the VAT group (en-us: Sales tax group) as usual (see Minimalistic EU VAT configuration in D365):
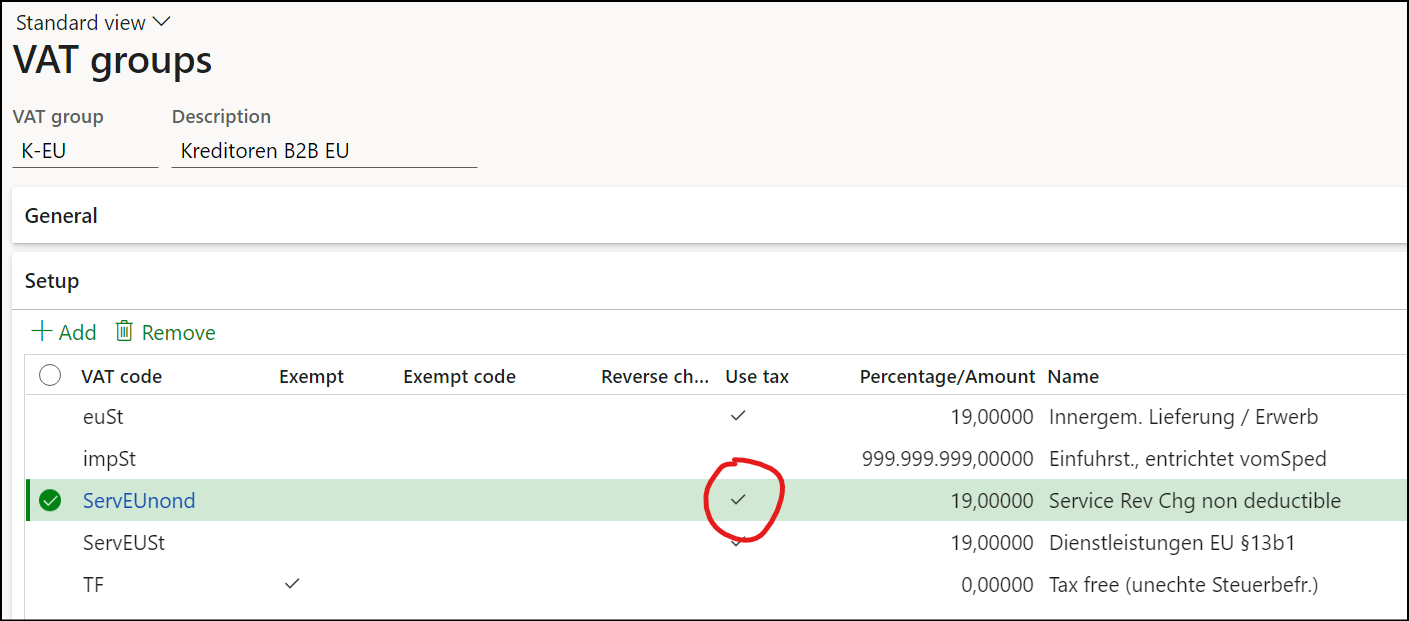
On top of that, the special VAT code (here: ServEUnond) for the non-deductible Reverse Charge receives Non deductible % = 100% in the tax code value:

The use tax VAT from the supplier invoice calculated in this way “elongates” the original expense, the GL voucher reflects the fact that the service effectively becomes more expensive by 19% (in DE).

This may be considered right or wrong, but a different expense account such as 7xxx “VAT, non-deductible” is not possible in standard Dynamics 365. If needed, this tax expense may be reallocated to a different account manually at the end of the period.
The monthly/quarterly Tax > Declaration > VAT > Settle and post VAT operation does not find any VAT receivable to offset the VAT payable and transfers the liability into the Tax authority’s payable account:

Bingo!
In the case of self-billing, the VAT payable is subtracted from the revenue: the credit note is booked as a revenue via a specially prepared procurement category, for example. The VAT “contracts” the revenue, and in order to do so, the rate of the tax must be negative (!), i.e. -20% (or -19% in Germany). The Negative VAT percentage must be activated first at the tax code record.
Blog series on VAT in the EU

Further reading:
D365 BC: Mix of input and output VAT in one credit note
Luxembourg VAT Declaration for D365FO in PDF
Troubleshoot the VAT Declaration in D365 for Finance
Advance payment invoices in Fixed fee projects in D365, D-A-CH style
Sometimes you pay Reverse Charge in D365
Minimalistic EU VAT Configuration in Dynamics 365
Austrian VAT declaration / Umsatzsteuervoranmeldung 2020
EU Tax directives