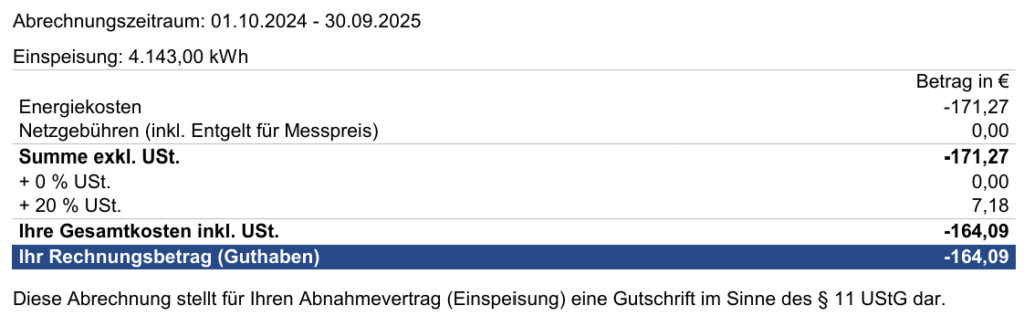
Once a year, I get a tricky invoice for the PV generation from my power supplier. They reimburse me for the delivery of the photovoltaic electricity into the power grid, and one invoice contains:
- reverse charge (output VAT, 0%)
- supplier services (input VAT, 20%)
If the energy is supplied to the grid by an entrepreneur to an entrepreneur, it is subject to VAT under the reverse charge mechanism. The reverse charge VAT is paid by the customer in this case, and the grid operator / utility company is the customer for the PV feed-in. However, usually they supply energy to our company i.e. they are registered as a vendor in the ERP system. The document is issued by the utility in my name under a self-billing arrangement (“Gutschriftsverfahren“). Consider the following:
- the PV feed-in is a side revenue of my company;
- one solution would be to register the vendor as a customer and perform the netting (see Consolidating customer and vendor balances in Business Central);
- however, the invoice number is issued by the vendor. If the vendor is registered as a customer, the credit note can only be entered in the General journal as a generic GL transaction;
- most of the revenue is VAT exempt under the reverse charge regime, but the supplier also included his services on top. These services (well hidden on the printed invoice) not only reduce the revenue, but there is also a VAT on top;
- as a result, the credit note contains both the 0% output VAT (0% sales reverse charge) and the regular 20% input on services.
This was a tough case. The solution is to keep the vendor a vendor, posting revenue via a purchase document and mixing VAT directions in it.
Registering a purchase invoice did not work, D365 Business Central kept showing the “Amount must be negative in Gen. Journal Line Journal Template Name=”,Journal Batch Name=”,Line No.=’0′.“ error. Unlike Dynamics 365 for Finance, in BC the Invoice and the Credit memo are 2 distinct document types, and the invoice may not be negative. Only the Credit memo can.
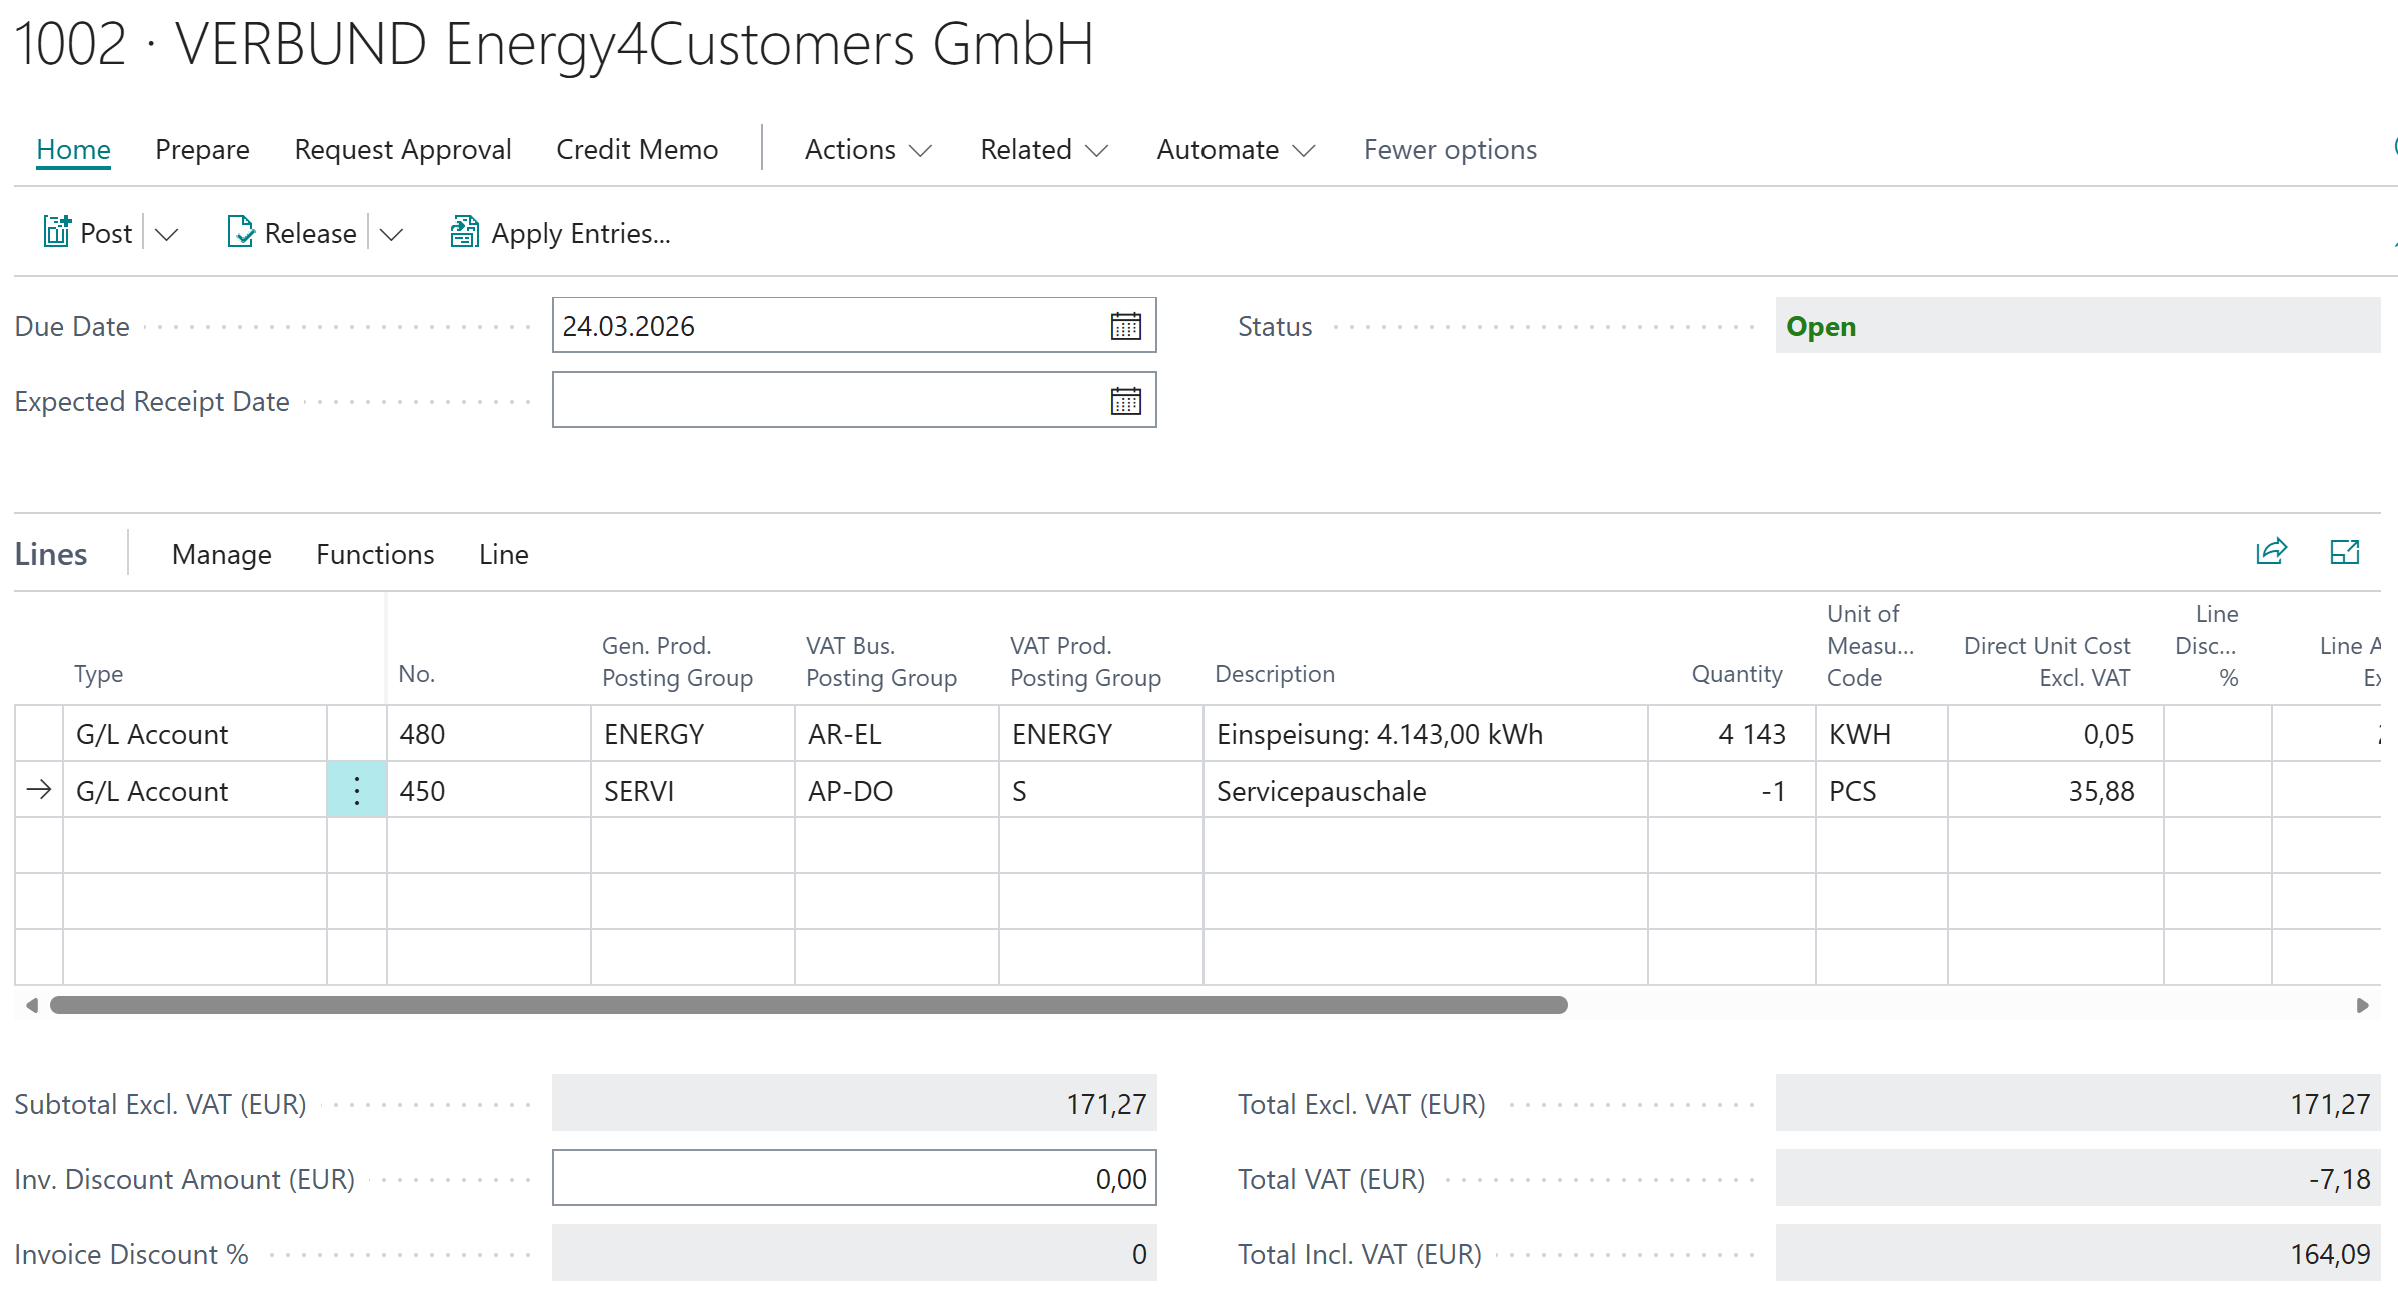
Enter a Purchase Credit Memo. In one line, enter the amount received for the PV feed-in in connection with a revenue account and select a customer (!) VAT Bus. Posting Group (the group must be made visible through a personalisation). This forces Business Central to treat the VAT as output VAT despite using a purchase document.
The service shall be entered with a negative quantity against a revenue reduction account, while the VAT group remains the regular one for the input VAT:
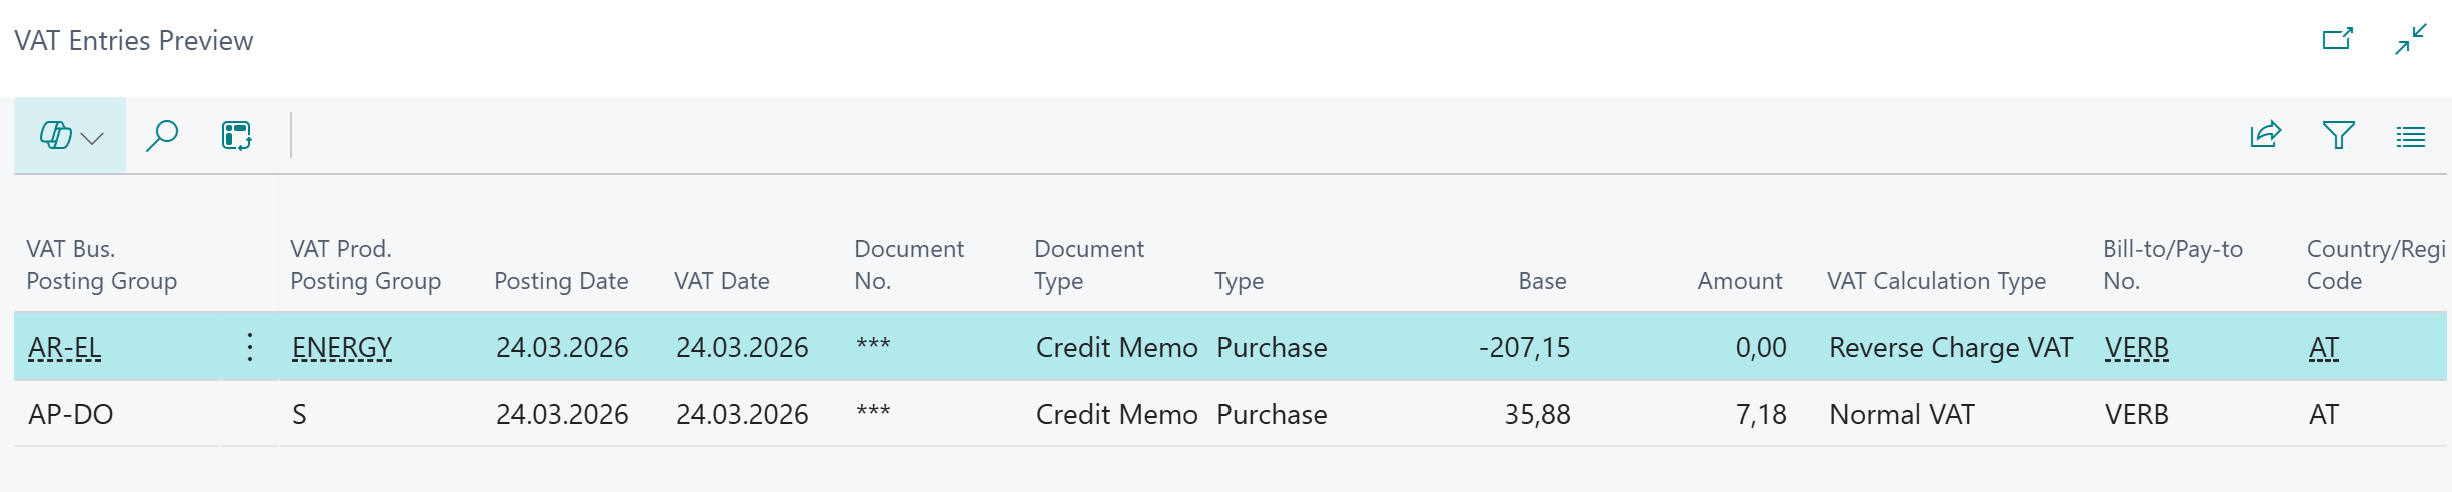
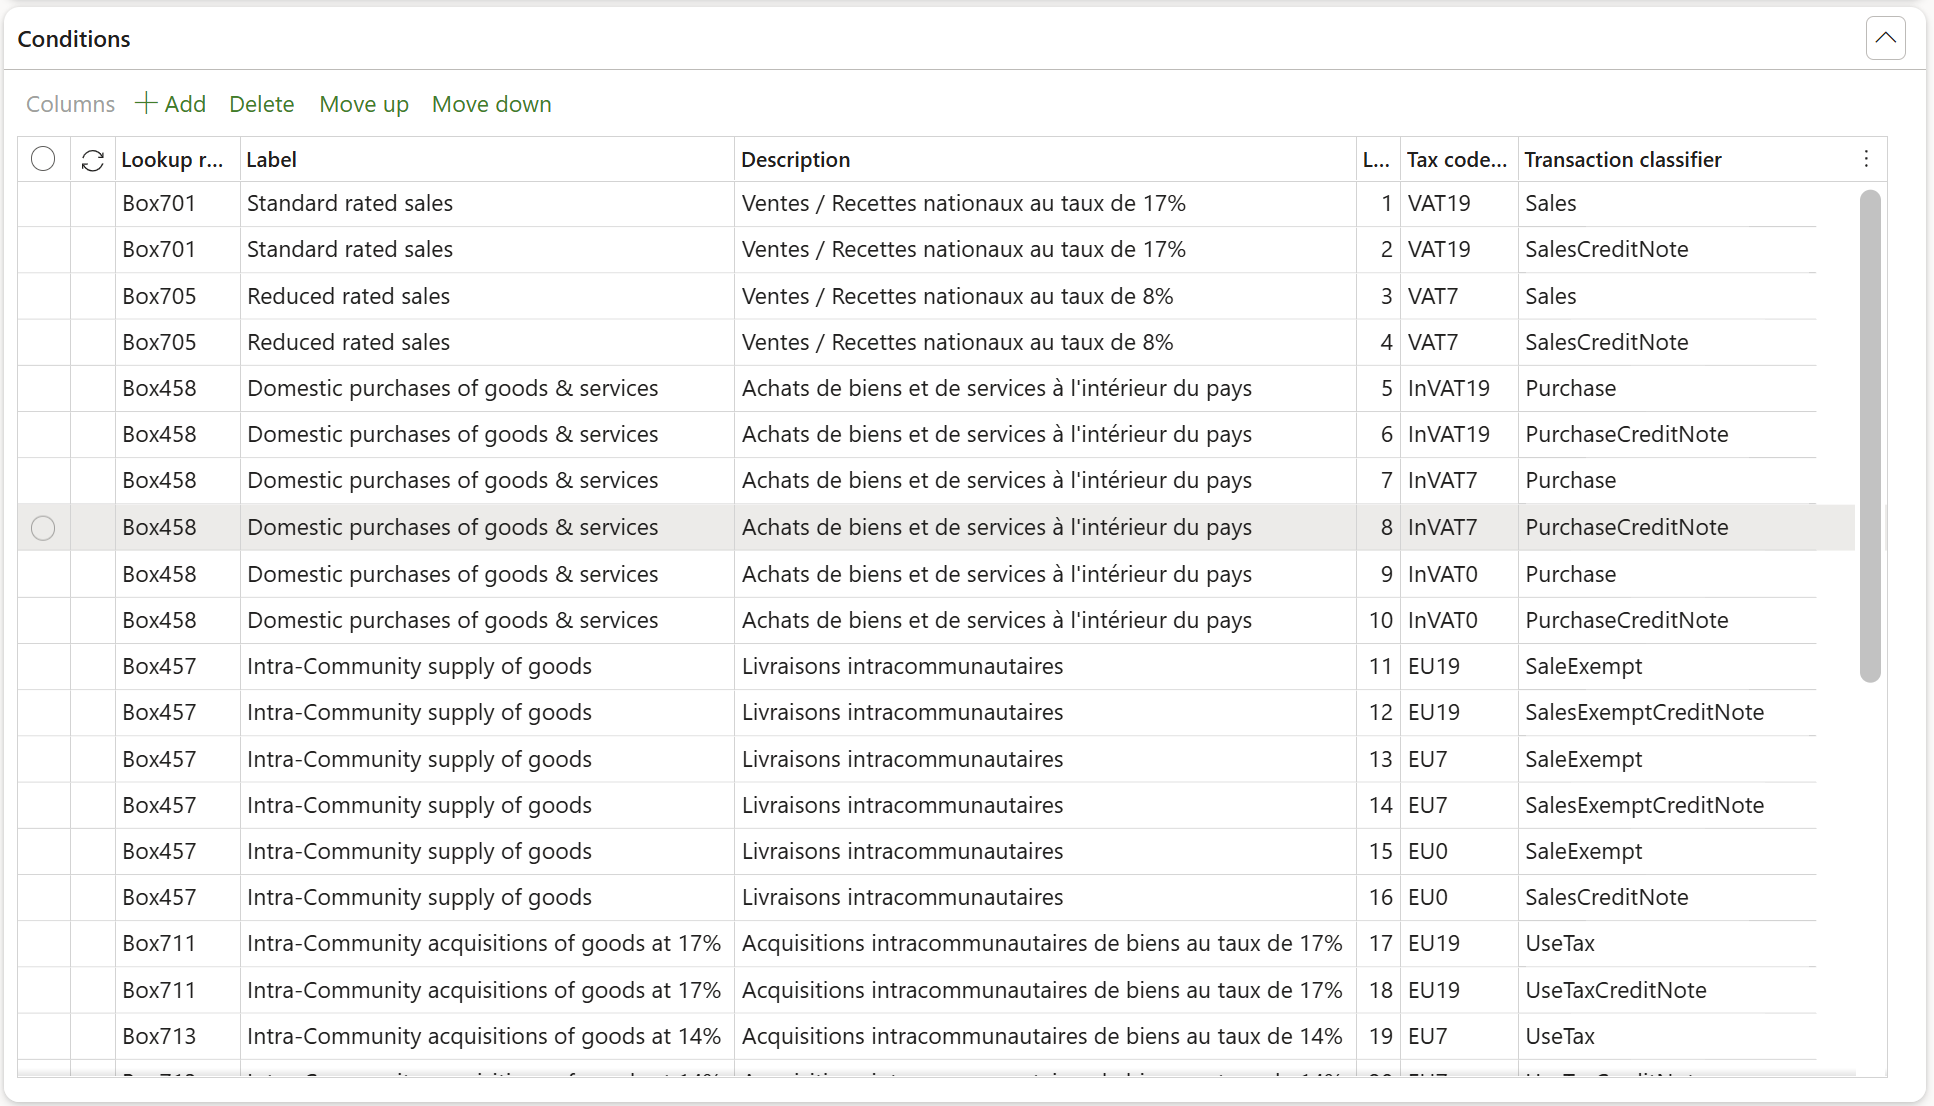
The reverse charge must be reported as such on the monthly VAT statement. Unlike D365 FO, the Business Central does not strictly follow the Sales direction of the VAT when making the VAT return. In the VAT statements matrix, add the Purchase VAT into the reverse charge section to record and report the PV turnover:

Blog series on Finance and VAT in the EU

Further reading:
Luxembourg VAT Declaration for D365FO in PDF
Troubleshoot the VAT Declaration in D365 for Finance
D365 Petty cash review
Advance payment invoices in Fixed fee projects in D365, D-A-CH style
Sometimes you pay Reverse Charge in D365
Minimalistic EU VAT Configuration in Dynamics 365
Austrian VAT declaration / Umsatzsteuervoranmeldung 2020
EU Tax directives