Dynamics 365 SCM: Do not reserve in Inbound

Dynamics 365 Inbound status process

Dynamics 365 SCM: Do not reserve in Inbound

You are going to have this error in Dynamics 365 Warehouse management, guaranteed. The error manifests itself at the production order picking or at sales order picking: the picking location is empty. Depending on the Location directive failures setup under the Warehouse management parameters this is going to either create a broken warehouse work or throw an error, but the outcome will be bad in any case.  This issue can occur when materials or merchandise have arrived but have not yet been put away in their expected location. They are not on the shelves but still somewhere in a staging area, possibly waiting for sorting or expecting a quality control. If your location directives are correct, you may need to adjust your inventory status settings to prevent this issue from happening.

The below recipe was invented either by Carsten or Thomas, maybe Nicolas, all kudos to them, I have just picked up the torch, refined the recipe and shared it with my colleagues and customers at 2 other implementation projects.

In a nutshell, create a new Inventory status called INBOUND and assign it to every purchase order. Make sure every sales or transfer order becomes the regular inventory status AVAILABLE. When a production order covers the demand, it will inherit the “Available” status and pass it to the BOM lines. Only “Available” raw materials will be reserved, not “Inbound”. If you attempt to release the production order, it will fail, because the reservation will misfire (but only if you install my fix Production order should not get Released on material shortage). This is a desired behaviour, because the materials have not been inspected or deconsolidated yet. The “Inbound” inventory status remains transparent to master planning and won’t be replenished unless the quality inspection fails and the goods become BLOCKED.

To implement this scenario, you’ll need to adjust some very specific parameters throughout the system. Below are the notes to myself:

  1. Inventory status InboundIn Warehouse management > Setup > Inventory > Inventory statuses, add a new inventory status called “Inbound“. Do not mark it as inventory blocking; it only needs to differ from the “Available“.
  2. In Warehouse management > Setup > Warehouse > Warehouses, do not set the default inventory status ID at your advanced warehouse, as it will overrule other settings.Default inventory status ID
  3. In Warehouse management parameters, set the default inventory status ID to “Available” and mark Use default status for sales orders and transfer orders to force most material demand to look for Available items only.Default inventory status for sales orders
  4. Default purchase inventory status IDEnsure that every purchase order line becomes a different status by assigning the default inventory status ID “Inbound” to every supplier, new or existing (Accounts payable > Vendors > All vendors).
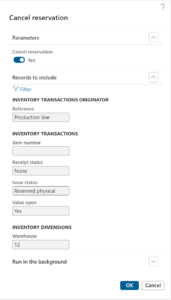
  5. Turn OFF the Reserve ordered items inventory parameter in Inventory management > Setup > Inventory and warehouse management parameters. To be honest, I have not seen any customer yet who benefited from the reservations in purchase orders not yet received, it just messes things up. If you do let the system reserve in open purchase orders, it is going to reserve the Inbound status, which is clearly not our intent, and the picking location will be empty again.
  6. Now it becomes tricky. If you use master planning, do not firm planned orders in the Standard or– God forbid – Extended Update marking mode. This marking will again be later converted into a fixed reservation of the materials / merchandise in the Inbound status. Instead, carefully set the default Update marking mode in Master planning > Setup > Master planning parameters. In a retail/distribution scenario, choose “None”. In a MTO (manufacture-to-order) or a ETO (engineer-to-order) scenario, choose Single level standard. The latter is quite a new addition to Dynamics 365 SCM: D365 New Feature – Make to order supply automation – Logan Consulting. This will establish a link between the Sales order and the production order, but not their lines or lower-level production orders to purchase orders. If there is a strong need for a chain of assembly / sub-assembly’s production orders, you may still use the Pegged supply BOM line type. This will make the upstream production order a derived requirement and it will establish a firm marking between the top-level and bottom-level production orders.
  7. Change inventory status InboundConfigure a recurring batch job in Warehouse management > Periodic tasks > Change inventory status to quickly update the status of “Inbound” items to “Available” once they are put away in their regular storage locations. Find a good set of criteria to capture all regular locations for storage and picking:

By following these steps, you can avoid the empty picking location error and ensure that your inventory status settings are correctly configured.

Production order should not get Released on material shortage

Production order should not get Released on material shortage

Update 27.08.2024: The below issue has ultimately been solved by Microsoft in Update 38, see What’s new or changed in Dynamics 365 Supply Chain Management 10.0.38 (February 2024) – Supply Chain Management | Dynamics 365 | Microsoft Learn. The feature “Prevent production orders to be released when full material is not available” is described as follows: “Fixes an issue where the production control parameter Requirement for material reservation is set to Require full reservation. Previously, when a production order was released while this option was selected, its status was always changed from Scheduled to Released, even if all material couldn’t be fully reserved. When this feature is enabled, when a production order is released with this option selected, the production order will only change status once all material is fully available for reservation.”

There is an evergreen issue in Dynamics 365 material reservation for production: despite the policy “Require full reservation“, the production order is released even if there is a shortage of materials:

The issue is very well known, I have been combating it since 2018. It has been reported to Microsoft on numerous occasions by my colleagues around the world: Production order should not get status Released if raw material release to warehouse fails.

The consequences are dire. A released order’s jobs will appear on the Shop floor control terminal and animate the worker to start the order. In the course of the assembly the worker is going to be forced to interrupt his/her work and fetch the parts from the warehouse. Later, at the report as finished / material backflushing stage at the Production floor terminal, it is going to prevent the online material consumption if the backflushing principle is set to Finish.

Apparently, the BOM line and the warehouse work generation are not in the same transaction scope as the overall production order release. Indeed, the ProdWHSRelease call is performed outside of the ttsbegin/ttscommit pair in ProdUpdRelease

Since Microsoft refuses to fix this problem, let me publish a programmatic solution. We put the ProdWHSRelease call into the endUpdateProduction() method if the order requires full reservation. Then we prevent the execution of ProdWHSRelease for the second time by temporarily changing one parameter and then reverting it back:

DontReleaseOnMaterialShortage.axpp

ttscommit;
                this.printout();
            }
        }
        catch (Exception::Deadlock)
        {
            retry;
        }
...
        prodTable.reread();
        if (ProdParametersDim::find(prodTable.InventDimId).ProductionLineRelease == WHSProductionLineRelease::OnProdOrderRelease)
        {
            ProdWHSRelease::newFromProdParmRelease(prodParmRelease).whsReleaseSingleOrder(prodTable);
        }

ZUGFeRD 2.2/ Factur-X 1.0 for Dynamics 365 FO

ZUGFeRD 2.2/ Factur-X 1.0 for Dynamics 365 FO

We are excited to announce the release of the common German-French electronic invoice ZUGFeRD / Factur-X in Dynamics 365 for Finance and SCM. This plug-and-play solution in its “Light” version does not require any customisation and can be easily installed in the standard Electronic Reporting module of D365. It supports the ZUGFeRD 2.2/Factur-X 1.0 profile EN 16931, also known as the “COMFORT” profile, which meets all tax law requirements and must be accepted by customers unless explicitly denied.

In the ZUGFeRD/Factur-X standard, the invoicing information is included in an XML payload attached to a human-readable PDF file (see https://de.wikipedia.org/wiki/ZUGFeRD). This is in contrast to the Italian electronic invoicing system, where a PDF is embedded in a Base64 encoded block within an XML. The PDF document is just a visualisation of the electronic content, what counts is the XML attachment. The XML file is always named factur-x.xml and it is attached to at the PDF document level, not to a single PDF page:

Here is an example: factur-x.xml

Our solution, which utilizes Configurable business documents in D365, supports Sales invoices with separate buyer, seller, and order accounts. Other types of invoices such as the Free text invoice or any of the 3 Project invoices, can be provided upon request at a discounted price. Our solution also handles form notes, line and header notes and footers, line discounts, total discounts, and cash discounts, document level charges, properly reflecting VAT for domestic, EU, and export sales. The settlement instructions orchestrate a SEPA credit transfer or a SEPA direct debit withdrawal; partially prepaid invoices are properly interpreted. The solution is available in French, German, and American English.

Price

The solution is offered at a fixed fee per end customer / D365 tenant:
VersionPriceDeliverablesNotes
Light€890A ZUGFeRD Sales invoice ER configuration, the XML file onlyThis option does not require any X++ customisations or 3rd party software and can be installed and used right away.
Light+€1200Same as the Light version but with 5 hours of prepaid support and installation 
Heavy€2200Contains the full solution, including a PDF template, and a PDF post-processor with 8 hours of prepaid support.Includes the iTextSharp 5.5.13.2 .NET library under the GNU Affero General Public License
Includes the BouncyCastle 1.8.9 .NET cryptographic library under a variant of the MIT license.

You may acquire the solution on the official Microsoft App Source portal: https://appsource.microsoft.com/en-us/product/dynamics-365-for-operations/er-consultgmbh1674479095356.zugferd_light_plus

Setup and use


Basic setup: “Light” and “Heavy”

  1.  Import the Electronic configuration “ZUGFeRD Sales invoice” provided to you (Organisation administration > Electronic reporting > Configurations, button Exchange / Load from XML file). For the ease of installation, configuration and integration, the standard Invoice model Invoice model v 277 and the standard Invoice model mapping 277.258 are used, make sure they have been imported upfront.
  2. Beware: the standard Invoice model mapping from Microsoft has a number of shortcomings. For instance, the buyer and seller addresses are passed in a de-normalized form as multi line strings. As a walkaround, some heuristics and regular expressions have been applied to extract the ISO2 code of the country and the zip (postal) code. A well-known modification to the standard Invoice model mapping will fix that and reinforce the report. Futhermore, the current Microsoft Invoice model mapping does not pass the EU Tax directives to the report. At the moment, the report relies on the non-EU Tax exempt codes in the same way as the standard Excel invoice does. To leverage the Tax directives, fix the model mapping, then modify the ZipFolder/InvoicePDF/SalesTax/SalesTax* mappings in ZUGFeRD Sales invoice format like this:
    IF(OR(@.Value.TaxExemptDescription<>"",@.Value.TaxDirective<>""),
    IF(@.Value.TaxExemptDescription<>"",@.Value.TaxExemptDescription,@.Value.TaxDirective),
    @"GER_LABEL:PlusVAT")
  3. Under the button Configurations / Application specific parameters / Setup, provide a mapping of the VAT (en-us: Sales tax) Print codes to the ZUGFeRD categories S, K, AE, G, O (for example, the 19% and 7% VAT belong to the “S” category). Also provide a mapping of the D365 Unit of measure codes to the UNECE Recommendation No. 20 list called “Codes for Units of Measure Used in International Trade” (see Codes for Units of Measure used in International Trade: Recommendation N°.20 – Revision 7 | UNECE). For instance, a piece has the standard code H87. An “each” ea  may be translated to C62. A sample parameter setup can be downloaded here: 03-01-2023 03.29.45 pm_ZUGFeRD Sales invoice.277.11
  4. Pay attention to the sample VAT print codes on the screenshot above: the standard Invoice model mapping does not pass the tax rates to the report, and the VAT Print code must contain the VAT rate in numbers, if applicable. In other words, they should look like “19%” and “7%” in Germany or “20%” and “5,5%” in France. Beware: these symbolic “print codes” persist in the tax transactions and invoice lines along with the VAT codes, i.e. they are historized and must be set correctly from the beginning.
  5. The mapping of the sales units of measure is against the language-specific, translated unit code (if exists), not the UoM symbol used in D365 globally, i.e. not pcs but Stk. This Stk. then becomes H87 in the output file. The configuration translates the local units of measure to one of the H87, KGM, MTR, LTR, TNE, CMT, HUR, DAY, GRM, MIN, MON, WEE, MMT, SEC, C26, YRD, APZ, FOT, GLL, INH, ONZ, LBT. The Years class is used as a fallback: no translation is applied; for example, a ea mapped to Years remans ea in the output file.
  6. Once both the mappings have been established, set the Application specific parameters State to Completed.
  7. Open Sales ledger (en-us: Accounts receivable) > Setup > Forms > Form setup. Make sure that the VAT specification option is set to Registration currency. You will also probably Print VAT number on invoice, show some invoice line inventory dimensions and/or notes, and display external item numbers (Item number in forms = Both).
  8. Finally, open Print management and select the Report format = ZUGFeRD Sales invoice at the Customer invoice node. The Light version setup ends here.

Supplementary setup: “Heavy”

  1. For the Heavy version, first deploy the X++ customisations and libraries from a D365 deployable package provided to you.
  2. Create a new File document type in the Organisation administration > Document management > Document types list. Name it exactly like this: ZUGFeRD.
  3. Create a new ER destination (Organisation administration > Electronic reporting > Electronic reporting destination) for the report ZUGFeRD Sales invoice. Under File destination, add a new line and choose the ZipFolder file component.
  4. Click Settings. To show the invoice on the Screen, divert the file to the Archive: set Enabled and Save in job archive, and choose file Type = ZUGFeRD. For this screen destination, make sure that the feature Configure action-dependent ER destinations (https://learn.microsoft.com/en-us/dynamics365/fin-ops-core/dev-itpro/analytics/er-action-dependent-destinations) is not used: the selection Document type in the ER destination must be set to Any.
  5. To send the invoice per Email, add a new file destination line, click Settings, open the tab ZUGFeRD, and flip the Email slider. In the Email ID parameter, you may also select an Organisation administration > Setup > Organisation email template with an appropriate subject and a HTML body in your corporate design. Placeholders%ExchangedDocument% (invoice ID), %DuePayableAmount% (invoice amount) and %BuyerTradeParty% (customer ID) are supported out of the box i.e., the email subject and body of the email are dynamic. The selection Document type in this ER destination must remain Any or Electronic. ZUGFeRD ER destinations: Email
  6. The steps to configure the Heavy version end here. The Electronic Reporting engine will fill out the PDF form, populate an XML file and put both into a folder (i.e. a ZIP). This ZIP file is intercepted, unpacked, and the XML part is embedded into the PDF, adding some references and mandatory attributes. The PDF file is not fully PDF-A/3 compliant, but it can be read and parsed, the XML payload passes the validations (see the links below).
  7. Print the sales invoice with the option Use print management turned on. The resulting PDF document is rendered on the screen (the Light version offers an XML file to download) in a separate browser window or sent per e-mail to the email contact of the customer with the role Invoice. In the batch invoicing mode (de: “Autofaktura”), the Screen destination is obsolete.
  8. You may also re-print invoices out of the Invoice journal form (Sales ledger > Enquiries and reports > Invoices > …) with the button View. Be aware of the hardcoded safeguards against re-sending the invoice per email if already sent, and against mailing proforma invoices to the end customer:  “The file may not be sent: Pro forma invoice or Invoice copy“.
  9.  Here is a sample, you buy what you see:

Useful links

Extensibility

To implement a custom invoice design with a corporate logo, a certain colour palette or fonts, extend the ER configuration “ZUGFeRD Sales invoice” as any other ER configurable business document. Derive an own configuration, then extract, amend and replace the PDF template attached to the ER configuration version. Please bear in mind that PDF forms do not contain dynamic, repeatable ranges or cells. This is the reason why the number of invoice lines in the template is currently limited by 10; this number will be extended on demand. Refer to Design ER configurations to fill in PDF templates – Finance & Operations | Dynamics 365 | Microsoft Learn for more details.
 

The “output actions” are extendable: new output actions may be offered upon request at a discounted price. You may even implement your own /Class/ERFileOutputActionXXX_ZUGFeRD, for example:

/// <summary>
/// Send the resulting PDF to a browser window interactively
/// </summary>
[ERFileOutputAttribute_ZUGFeRD(SRSPrintMediumType::Screen)]
class ERFileOutputActionScreen_ZUGFeRD extends ERFileOutputAction_ZUGFeRD
{
    /// <summary>
    /// The screen destination does not need to extract any contact info
    /// </summary>
    /// <returns>An empty visitor class</returns>
    public ERFileOutputActionXmlVisitor_ZUGFeRD makeVisitor()
    {
        return new ERFileOutputActionXmlVisitor_ZUGFeRD();
    }

    /// <summary>
    /// Display  the PDF file formed by ERFileDestinationPostProcessor_ZUGFeRD on the screen
    /// </summary>
    /// <param name = "_outputPDF">Stream with a PDF file, with a CII XML attached</param>
    /// <returns>Success or failure to display</returns>
    public boolean sendFile(System.IO.MemoryStream _outputPDF)
    {
        Browser br = new Browser();

        str downloadUrl = File::SendFileToTempStore(_outputPDF,
                                                    ERConstants_ZUGFeRD::ZUGFeRD_Filename,
                                                    classstr(FileUploadTemporaryStorageStrategy),
                                                    true);
        if (downloadUrl != '')
        {
            br.navigate(downloadUrl, true, false);
        }
        else
        {
            return checkFailed("@ApplicationPlatform:DownloadFailed");
        }
        return true;
    }

}